Low Carb Bread: Secrets to Coconut Flour Oven Spring
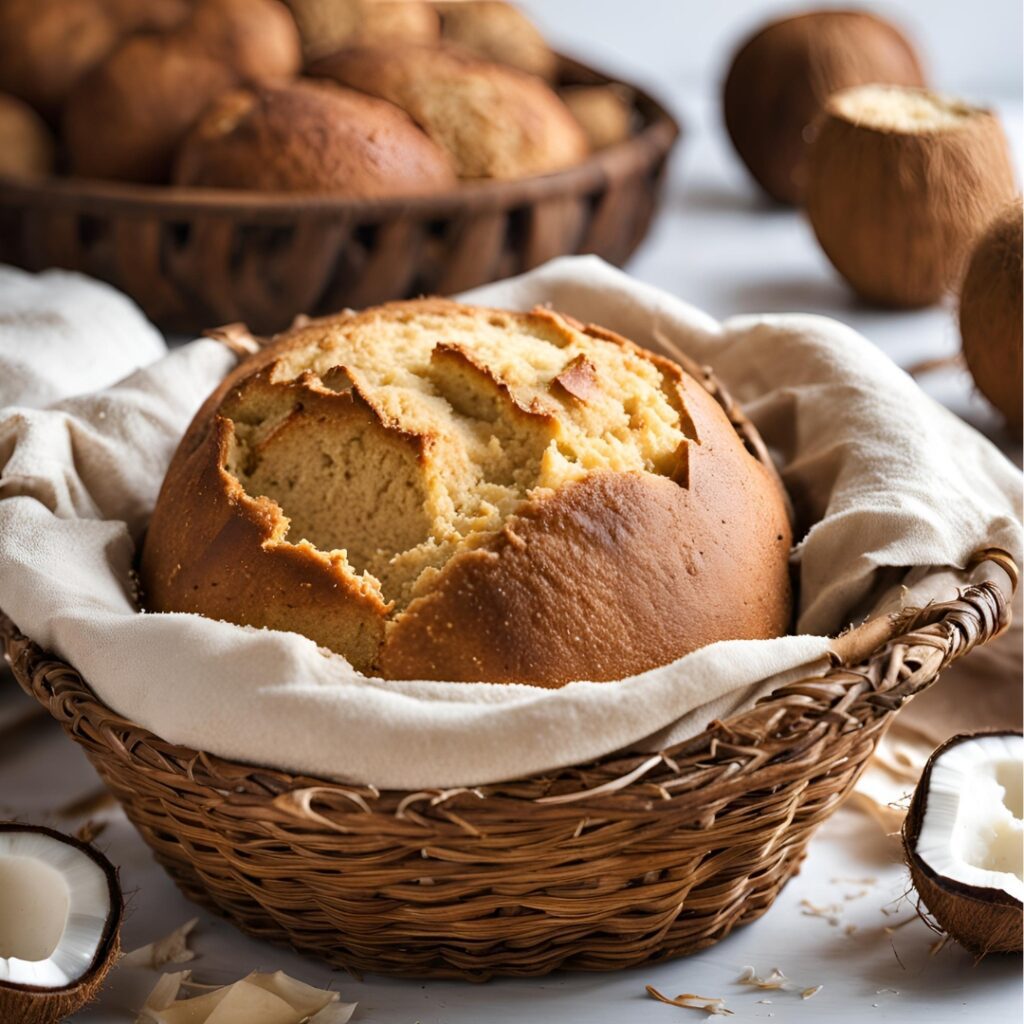
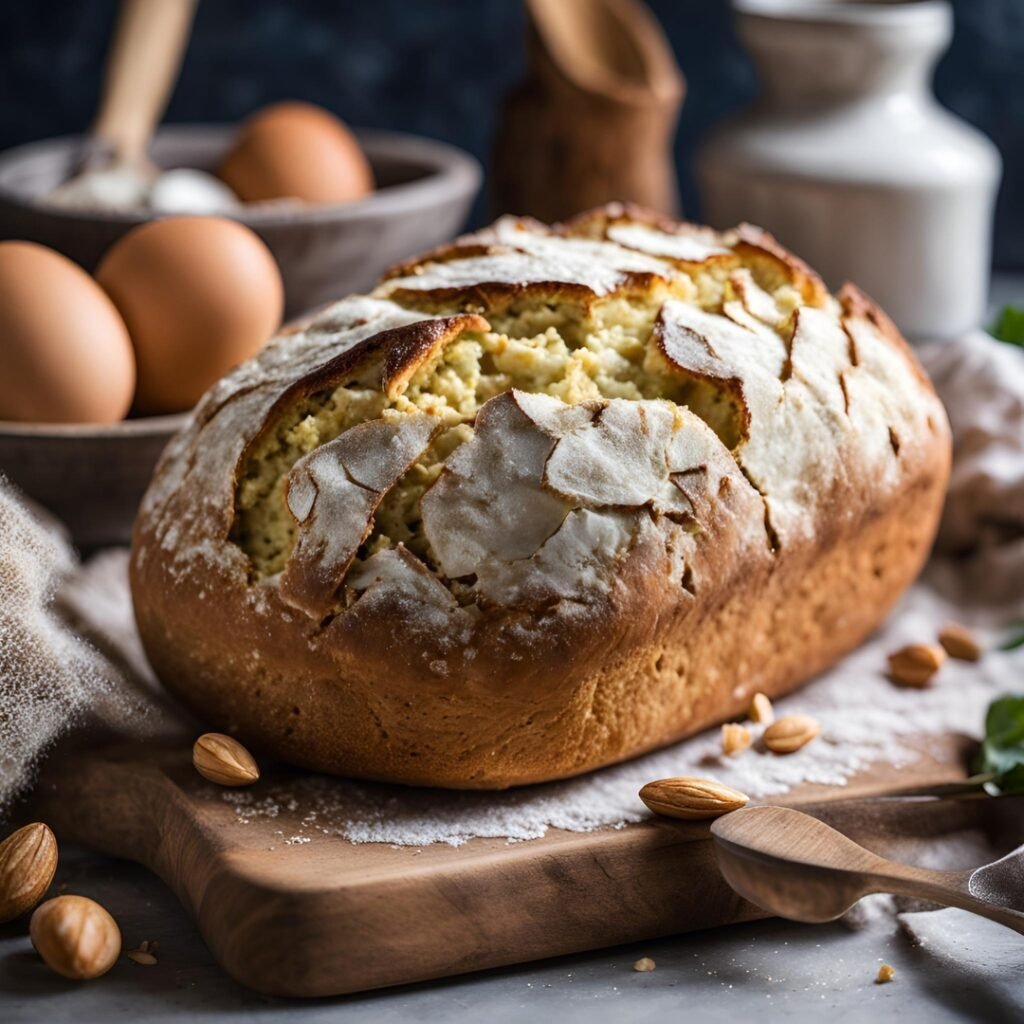
Baking low carb bread with coconut flour can be a bit tricky, but with the right techniques, you can achieve a beautiful oven spring. Coconut flour tends to be more absorbent and denser than other low carb flours, which can make it harder to get that light, airy rise typical of traditional bread. However, with the right approach, you can still achieve that perfect oven spring—the soft, airy rise that makes your loaf look and feel just like the real thing.
In this article, I’ll guide you through how to get a great oven spring when baking with coconut flour. Whether you’re new to coconut flour or looking to improve your low carb bread recipes, these tips will ensure your bread rises beautifully.
Oven spring is the initial rise that happens when dough is placed in the oven. This rise is essential for creating a light, fluffy texture in low carb breads made with coconut flour. While traditional bread relies on yeast and wheat flour for this rise, coconut flour requires a different approach to achieve that same soft, airy effect.
Getting a good oven spring within the first 10 minutes of baking is key to ensuring your coconut flour bread has a light texture and a better crumb structure. Without it, coconut flour bread can turn out dense and flat. But with the right techniques, you can achieve a perfect rise, giving your loaf a soft, airy interior and that satisfying pull-apart texture.
What Are The Health Benefits In Low Carb Bread With Coconut Flour?
Coconut flour is another excellent option for low-carb bread, offering its own unique set of health benefits. While it’s often used alongside other low-carb flours like almond flour, it’s especially prized for its high fiber content, low carbohydrate count, and rich nutrient profile. Here’s a detailed look at the health benefits of using coconut flour in low-carb bread:
1. Low in Carbs
- Very Low in Carbohydrates: Coconut flour is a great choice for those following a low-carb or ketogenic diet, as it contains significantly fewer carbs than traditional wheat flour. A 1/4-cup serving of coconut flour typically contains about 4 grams of net carbs, which is a fraction of the carb count found in regular flour.
- High Fiber Content: Despite the relatively low carb count, coconut flour is packed with fiber. A 1/4-cup serving of coconut flour contains around 5 grams of fiber, which significantly reduces the net carb count (total carbs minus fiber), making it an excellent choice for anyone trying to reduce their carb intake.
2. High in Fiber
- Supports Digestive Health: Coconut flour is an excellent source of soluble and insoluble fiber, which is important for maintaining digestive health. Fiber helps regulate bowel movements, prevent constipation, and promote gut health by feeding beneficial gut bacteria. The high fiber content also aids in controlling blood sugar levels, making it a great option for people with diabetes or those looking to maintain stable blood glucose levels.
- Promotes Satiety: The fiber in coconut flour helps to keep you feeling full longer, which may help reduce overall calorie intake. This makes it a helpful ingredient for those who are trying to lose weight or maintain a healthy weight by promoting feelings of fullness and reducing cravings.
3. Gluten-Free
- Ideal for Gluten Sensitivities: Like almond flour, coconut flour is naturally gluten-free, making it a perfect alternative for individuals with celiac disease or non-celiac gluten sensitivity. When used in low-carb bread recipes, it allows people who need to avoid gluten to enjoy a bread-like texture without any of the negative effects associated with gluten.
4. Rich in Healthy Fats
- Source of Medium-Chain Triglycerides (MCTs): Coconut flour is derived from dried coconut meat, which contains medium-chain triglycerides (MCTs)—a type of healthy fat that is easily absorbed and used for energy. MCTs have been linked to improved brain function, weight management, and fat-burning capabilities.
- Supports Heart Health: The healthy fats found in coconut flour, including MCTs and lauric acid, can help improve heart health by reducing bad cholesterol (LDL) and increasing good cholesterol (HDL). This can help lower the risk of cardiovascular disease when consumed as part of a balanced diet.
5. Rich in Nutrients
- Minerals and Vitamins: Coconut flour is a good source of several important minerals and vitamins, including:
- Iron: Essential for oxygen transport in the blood and to prevent anemia.
- Magnesium: Supports muscle function, bone health, and the nervous system.
- Potassium: Helps regulate fluid balance, maintain healthy blood pressure, and supports heart function.
- B Vitamins: Important for energy metabolism and cognitive health.
- These nutrients contribute to overall wellness, supporting everything from immune health to muscle function and energy levels.
6. Low Glycemic Index
- Helps Control Blood Sugar Levels: Coconut flour has a low glycemic index (GI), meaning it has a slower, gentler effect on blood sugar levels compared to high-carb flours. This makes it an ideal option for those with diabetes or anyone looking to manage blood sugar levels more effectively. The high fiber content in coconut flour also helps slow down the absorption of sugars, leading to more stable blood sugar levels.
7. Aids in Weight Management
- Promotes Fullness and Reduces Hunger: Coconut flour’s high fiber and fat content can help curb hunger, making it easier to manage portion sizes and reduce overeating. It also helps stabilize blood sugar, which can prevent energy crashes and cravings for sugary foods. By promoting satiety, coconut flour helps with weight management and can be an important part of a weight-loss strategy.
8. Supports Healthy Skin and Hair
- Good for Skin and Hair: The medium-chain fatty acids (MCTs) in coconut flour, particularly lauric acid, have been shown to have antimicrobial and anti-inflammatory properties. These can benefit skin health by reducing irritation and helping prevent acne or other skin conditions. Additionally, coconut’s healthy fats help keep skin hydrated and may promote healthy hair growth.
9. Helps Regulate Cholesterol Levels
- Supports Heart Health: The healthy fats found in coconut flour, particularly lauric acid, can help balance cholesterol levels by increasing levels of good cholesterol (HDL) while decreasing levels of bad cholesterol (LDL). Consuming coconut flour in moderation as part of a balanced diet can thus contribute to better heart health and reduced risk of cardiovascular diseases.
10. Balances Hormones
- Hormonal Health: Coconut flour, particularly due to its healthy fats, supports hormone balance in the body. Healthy fats are essential for the production of certain hormones, including those related to metabolism, stress, and reproductive health. By ensuring your body receives enough healthy fats, coconut flour helps maintain hormone levels and reduces symptoms related to hormonal imbalance.
Coconut flour is an excellent choice for low-carb bread, offering numerous health benefits such as promoting digestive health, supporting heart health, and helping manage blood sugar levels. Its high fiber content aids digestion and satiety, while its low glycemic index makes it ideal for those with diabetes or those trying to control their blood sugar levels. Additionally, coconut flour is rich in essential minerals, healthy fats, and antioxidants, all of which support overall well-being. By incorporating coconut flour into your low-carb bread recipes, you can enjoy a nutritious, gluten-free alternative to traditional bread with all the added health benefits that coconut flour has to offer.
How Do I Achieve Oven Spring With Coconut Flour Bread?
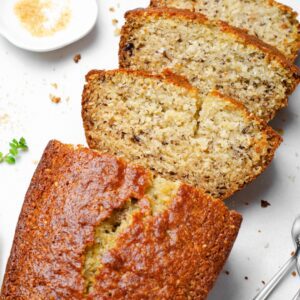
Coconut flour is a unique low carb flour that is highly absorbent and behaves quite differently from other flours like almond flour. When baking with coconut flour, achieving a good oven spring can be a challenge due to its dense texture and high moisture-absorbing properties. However, with the right techniques and ingredients, you can achieve a nice rise in your coconut flour bread.
Here are some specific tips to get the best oven spring with coconut flour bread:
1. Use Extra Eggs for Moisture and Structure
Coconut flour is much more absorbent than almond flour, which means it requires more moisture to achieve the right texture. Eggs play a crucial role in coconut flour bread. They provide both moisture and structure, helping the dough rise and hold its shape in the oven.
- How much to use?
- For 1 cup of coconut flour, you’ll typically need 5-6 large eggs. The higher egg count helps create enough moisture to support the coconut flour’s absorbent nature and also helps the bread rise during baking.
- Why it works:
Eggs add not only moisture but also structure, which helps your dough rise and gives the bread more flexibility. Without enough eggs, the dough will be too dry, causing the bread to be dense and flat. Eggs help trap air in the dough, contributing to a better oven spring.
2. Increase Hydration to Achieve the Right Texture
Coconut flour absorbs a significant amount of moisture, meaning that it requires more liquid than other low carb flours. To achieve a good rise, your dough needs to be hydrated properly. Without enough liquid, the dough will be too thick, and the bread will lack the necessary expansion when placed in the oven.
- How much liquid to use?
- For every cup of coconut flour, you’ll need to add at least 1 cup of liquid, such as water, almond milk, or coconut milk. In some recipes, this amount may increase depending on the consistency of the dough.
- Why it works:
Sufficient moisture allows the coconut flour to fully hydrate and gives the dough the elasticity it needs for a good rise. The added liquid helps activate the structure-forming properties of the eggs and keeps the bread from becoming too dry, ensuring the dough expands properly when exposed to heat.
3. Bake at a High Temperature to Create Quick Oven Spring
A high baking temperature is key to achieving a good oven spring in coconut flour bread. Since coconut flour dough can be heavy and dense, a hot oven will help create a rapid rise in the first few minutes of baking. The initial burst of heat causes the gases in the dough to expand, helping the bread rise and develop the desired texture.
- Ideal baking temperature:
Preheat your oven to 375°F to 400°F (190°C to 200°C). This higher temperature will help the bread rise quickly before it has a chance to collapse under its own weight. - Why it works:
A hot oven helps the dough rise quickly during the first few minutes of baking. The heat causes the leavening agents (like baking soda, baking powder, or eggs) to create gas bubbles in the dough, which expands rapidly and gives your coconut flour bread a better oven spring.
4. Add Baking Powder or Baking Soda for Extra Lift or Both
In addition to eggs and increased hydration, adding a leavening agent like baking powder or baking soda is crucial for getting a good rise in coconut flour bread. These ingredients release gas during baking, which creates air pockets and helps the dough expand in the oven. Coconut flour’s dense nature requires this extra lift to achieve oven spring.
- How to use?
- Use 1 teaspoon of baking powder or ½ teaspoon of baking soda per cup of coconut flour.
- Be careful not to overdo it, as too much baking powder can leave a bitter taste in the bread.
- Why it works:
Baking powder and baking soda react with the liquid in the dough to release carbon dioxide gas. This gas helps create bubbles in the dough, causing it to expand when heated in the oven. This leads to better oven spring and a fluffier texture.
5. Allow the Dough to Rest Before Baking
Resting the dough is another key step in making coconut flour bread. The resting time allows the coconut flour to absorb more liquid, ensuring the dough has the right consistency for rising. This step also gives the baking soda and baking powder time to activate, ensuring that the dough rises properly in the oven.
- How long to rest?
Allow the dough to rest for 10 to 15 minutes before shaping and placing it in the oven. This resting period lets the coconut flour absorb moisture more fully and helps improve the texture of the bread. - Why it works:
Resting the dough helps activate the leavening agents and ensures that the moisture is evenly distributed throughout the dough. It also prevents the dough from becoming too sticky or dry, which can impact how well it rises.
6. Use a Dark Metal Pan for Even Heat Distribution
The type of pan you use can make a big difference in how well your coconut flour bread rises. Dark metal pans absorb heat more efficiently than lighter-colored pans, helping the dough rise quickly and evenly. This is particularly important when baking with coconut flour, which requires a hotter, more consistent heat to achieve the desired oven spring.
- What type of pan to use?
Use a dark metal loaf pan with high sides to help the dough rise vertically. Avoid using glass or ceramic pans, as they tend to absorb heat more slowly and may result in uneven rising. - Why it works:
Dark metal pans absorb and distribute heat more quickly than other materials, which helps the dough rise more effectively. High-sided pans also help prevent the dough from spreading too much, encouraging a vertical rise and a better oven spring.
How to Achieve Oven Spring in Coconut Flour Bread
Achieving oven spring in coconut flour bread requires a bit of extra attention to ingredients and technique. Here’s a recap of the most important steps:
- Use extra eggs: Coconut flour needs eggs to provide structure and moisture. Use 5-6 eggs per cup of coconut flour.
- Increase hydration: Add at least 1 cup of liquid per cup of coconut flour to ensure the dough is hydrated properly.
- Bake at a high temperature: Preheat your oven to 375°F to 400°F to help the bread rise quickly and evenly.
- Add baking powder or baking soda: Use leavening agents to help the dough rise and create air pockets in the bread.
- Allow the dough to rest: Rest the dough for 10-15 minutes before baking to give the ingredients time to activate and absorb moisture.
- Use a dark metal pan: Bake in a dark metal loaf pan with high sides for better heat absorption and a more consistent rise.
By following these specific steps, you’ll be able to achieve a better oven spring, resulting in coconut flour bread with a lighter, airier texture and a more traditional rise.
What Role Does Psyllium Husk Play in Achieving Oven Spring in Coconut Flour Low Carb Bread?
Coconut flour is another popular low-carb flour that lacks gluten, which can make it challenging to achieve a light, airy loaf. When used alone, coconut flour tends to create dense, crumbly bread due to its high absorbency and lack of binding properties. This is where psyllium husk comes in—it plays a crucial role in improving both the structure and the rise of coconut flour-based bread, helping to create a better oven spring.
Here’s how psyllium husk works in achieving a successful oven spring when baking with coconut flour:
1. Hydration and Elasticity: Psyllium Absorbs Moisture for a Stronger Dough
Coconut flour is extremely absorbent, meaning it requires more moisture to achieve the proper dough consistency. When combined with psyllium husk, which also absorbs water, it helps create a dough with improved hydration, elasticity, and structure. The gel-like consistency that forms when psyllium husk absorbs moisture contributes to a more cohesive dough, allowing it to expand better during baking.
- How much to use? For every 1 cup of coconut flour, use 2 tablespoons of psyllium husk powder. This amount ensures that the dough can retain enough moisture and hold its shape as it rises.
- Why it works: Psyllium husk’s ability to absorb moisture creates a dough that is more elastic and able to trap air, helping to support the rapid rise (oven spring) during baking.
2. Binding and Structure: Helps Hold the Dough Together
Because coconut flour lacks gluten, it doesn’t naturally hold the dough together as well as wheat flour does. Psyllium husk acts as a binder, improving the cohesiveness of the dough and preventing it from falling apart. This allows the dough to hold its structure as it rises in the oven, promoting better expansion and oven spring.
- How it helps with oven spring: The gel formed by psyllium helps the dough retain its shape and structure during baking, allowing the dough to rise instead of collapsing or spreading out. This contributes to the rapid initial rise that defines oven spring.
- Why it works: The binding properties of psyllium husk hold the dough together and ensure that the air bubbles created by leavening agents (like baking soda or baking powder) stay intact, which helps the bread rise properly.
3. Texture Improvement: Reduces Density and Increases Airiness
One of the challenges of baking with coconut flour is that it can make the bread dry, dense, and crumbly. Psyllium husk addresses this by improving moisture retention, giving the bread a softer and more airy texture. This is particularly important for achieving a bread crumb that’s closer to traditional wheat bread, instead of the overly dense texture that is common with coconut flour.
- How it improves texture: The gel-like texture of psyllium husk helps the dough retain moisture, creating a more pliable and elastic bread dough. This results in a lighter, more airy crumb that is less dense and crumbly.
- Why it works: By improving moisture retention and helping the dough rise, psyllium husk reduces the risk of a dry, heavy loaf. It helps the dough maintain a tender crumb, ensuring the bread has a desirable texture.
4. Resting the Dough: Activating Psyllium’s Gelling Properties
Like with almond flour, it’s essential to let the dough rest when using psyllium husk with coconut flour. The resting time allows the psyllium husk to fully hydrate and activate its gelling properties, ensuring the dough reaches its full potential for rise and texture.
- How to rest the dough: After mixing your coconut flour dough, let it sit for 10 to 15 minutes before shaping and baking. This allows the psyllium husk to absorb the moisture fully and form the gel structure that’s critical for achieving oven spring.
- Why it works: Resting gives the psyllium husk time to activate, which strengthens the dough and helps it rise more effectively in the oven. This resting period also makes the dough easier to handle, preventing it from becoming too sticky or difficult to shape.
5. Psyllium Husk’s Role in Coconut Flour Recipes
Coconut flour’s high absorbency means that it requires additional moisture and structure to create a cohesive dough. Psyllium husk helps provide both, making it an essential ingredient when baking with coconut flour. By adding psyllium, you give the dough the elasticity and binding power it needs to rise well, preventing the dense, crumbly texture that coconut flour bread often has without it.
- Coconut Flour and Psyllium Husk: Since coconut flour is so absorbent, it requires more liquid than other low-carb flours. To balance this, 2 tablespoons of psyllium husk per cup of coconut flour is typically recommended. This allows the dough to hold together, expand in the oven, and retain moisture during baking.
- Why it works: Psyllium husk acts as a binder, creating a more cohesive dough that can better trap air bubbles. This gives the bread the potential for a better oven spring, allowing it to rise more effectively during baking.
How Psyllium Husk Enhances Oven Spring in Coconut Flour Bread
Psyllium husk is a vital ingredient for achieving a successful oven spring in low-carb breads made with coconut flour. Here’s how it helps:
- Hydration: Psyllium absorbs moisture, improving the dough’s elasticity and allowing it to rise more easily in the oven.
- Binding: Psyllium husk helps bind the dough together, promoting a better rise by preventing the dough from collapsing.
- Texture: By retaining moisture and improving the dough’s structure, psyllium creates a lighter, more airy texture, reducing the density and crumbly nature of coconut flour bread.
- Resting Time: Allowing the dough to rest before baking ensures that the psyllium husk can fully activate, providing optimal structure and rise.
- Adaptability with Coconut Flour: Since coconut flour is highly absorbent, adding psyllium husk helps balance the moisture and improves the bread’s rise and texture.
By incorporating psyllium husk into your coconut flour bread recipe, you can achieve a lighter, fluffier loaf with improved oven spring. This makes the final result more similar to traditional wheat-based bread, with a better texture, rise, and crumb.
How Can I Use Baking Powder for Better Oven Spring?
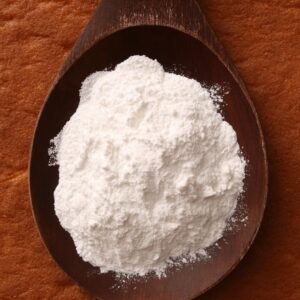
Baking powder is an essential leavening agent in low carb bread because it helps the dough rise by creating bubbles that expand in the oven, resulting in a light, fluffy loaf. However, using baking powder correctly is key to achieving the best oven spring without compromising the flavor or texture.
Here’s how to use baking powder effectively for better oven spring in your low carb bread:
Use Baking Powder in Moderation:
While baking powder is important, using too much can result in a bitter taste and a dense, undesirable texture. For most low carb breads, the right amount of baking powder will create a noticeable lift without affecting the flavor.
- How much to use?
Typically, for every 1 cup of low carb flour (like almond flour or coconut flour), you should use about 1-2 teaspoons of baking powder. This amount is usually enough to help the dough rise without causing a bitter aftertaste.Tip: Start with 1 teaspoon per cup of flour and adjust as needed depending on the texture and rise you’re looking for. For denser breads (like coconut flour bread), you may want to add a little more.
Combine with Other Leavening Agents:
For the best oven spring, it’s often helpful to combine baking powder with other leavening agents, such as baking soda and vinegar. This combination creates a balanced chemical reaction that gives the dough a better rise and a lighter texture. The acid from the vinegar helps activate the baking soda, which in turn creates carbon dioxide bubbles that expand when baked.
- Baking Soda & Vinegar Combination:
- Baking Soda needs an acid (like vinegar or lemon juice) to activate it. When combined, they produce gas that helps the dough rise.
- Vinegar provides the acid needed to activate baking soda, boosting the dough’s rise.
- How much to use?
For every teaspoon of baking soda, add about 1 tablespoon of vinegar. You don’t need much vinegar, as it reacts quickly with the baking soda, releasing gas. However, make sure the vinegar doesn’t overpower the bread flavor. You can use apple cider vinegar or white vinegar for this purpose. - When to add?
Mix the baking powder, baking soda, and vinegar into your dough just before baking, ensuring they’re well incorporated. If you leave it too long, the reaction may happen prematurely and lose some of its power before hitting the oven.
Check the Freshness of Your Baking Powder:
Baking powder has a shelf life, and using expired or old baking powder can drastically reduce its leavening power. Old baking powder won’t create as many gas bubbles, which results in a flat, dense loaf.
- How to check for freshness?
To test your baking powder, place a teaspoon of it in a small bowl with a bit of hot water. If it fizzes actively, it’s still good. If it doesn’t, it’s time to replace it. - Storage tips:
Store your baking powder in a cool, dry place, tightly sealed to keep it fresh. Ideally, use it within 6 months of opening for the best results.
Balancing Leavening for Different Low Carb Flours:
Different low carb flours absorb moisture and rise differently, so the exact amount of baking powder can vary based on the type of flour you’re using.
- Almond Flour Bread:
Almond flour has a relatively high fat content and doesn’t absorb moisture as much as coconut flour. As a result, it needs less baking powder to rise. 1 teaspoon per cup of almond flour is usually sufficient. For best results, combine it with a small amount of baking soda (½ teaspoon) and vinegar (1 teaspoon). The fat in almond flour also helps the bread rise and stay moist. - Coconut Flour Bread:
Coconut flour is highly absorbent and requires more moisture and leavening. You’ll often need a bit more baking powder to achieve a good rise. For every 1 cup of coconut flour, use 2 teaspoons of baking powder. Pair this with ½ teaspoon of baking soda and 1 tablespoon of vinegar. The added moisture will help the dough hold its shape and rise more effectively. - Psyllium Husk:
If you’re using psyllium husk as a binder, you may need slightly less baking powder. Psyllium husk can help create structure in the dough, allowing it to rise naturally without too much leavening. A ratio of 1 teaspoon of baking powder per cup of flour is generally sufficient when using psyllium husk.
Why Baking Powder Matters for Oven Spring:
When baking low carb bread, achieving a good oven spring is all about creating the right balance of ingredients that can produce bubbles that expand when exposed to heat. Baking powder provides a reliable source of gas bubbles that cause the dough to rise and become fluffy during the initial stages of baking.
Without leavening agents like baking powder, the bread can turn out flat and dense, with little lift or structure. It’s especially important in low carb baking because many low carb flours (like almond flour and coconut flour) are denser and don’t have the natural gluten structure found in wheat flour, which is responsible for helping bread rise. Baking powder steps in to provide the necessary rise.
Additionally, baking powder also contributes to texture. When used correctly, it will help the bread have a light, airy crumb, instead of a dense or heavy texture.
How to Get the Best Oven Spring with Baking Powder:
To achieve the best oven spring with low carb bread:
- Use baking powder in moderation: About 1 teaspoon per cup of almond flour or 2 teaspoons per cup of coconut flour.
- Combine with baking soda and vinegar: This combination boosts the rise by creating gas bubbles in the dough.
- Ensure freshness: Test your baking powder regularly to make sure it’s still effective.
- Adjust for different flours: Almond flour requires less leavening, while coconut flour needs more due to its absorbent nature.
By following these guidelines, you’ll create dough that rises beautifully and results in a light, fluffy low carb bread with perfect oven spring every time.
How Does Flaxseed Meal Contribute to Oven Spring in Low Carb Bread with Coconut Flour?
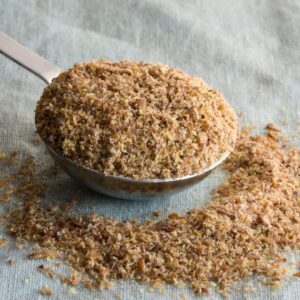
Flaxseed meal is often a key ingredient in low-carb bread recipes, particularly when using coconut flour. While flaxseed meal provides excellent nutritional benefits—such as high fiber content and healthy fats—it can also have a somewhat dense texture. If not used properly, flaxseed meal can weigh down your dough, making it harder to achieve a light, airy loaf with a good oven spring. However, when combined with the right ingredients and hydration, flaxseed meal can play an important role in creating a bread that rises well and maintains a fluffy texture.
Here’s a guide to understanding how flaxseed meal can contribute to oven spring in low-carb bread made with coconut flour:
1. Combine Flaxseed Meal with Psyllium Husk for Better Structure
Coconut flour is inherently absorbent, and when combined with flaxseed meal, the dough can become heavy and lack structure. To achieve a better rise and improve the dough’s elasticity, combining flaxseed meal with psyllium husk helps to create a cohesive dough that can expand properly during baking. Psyllium husk acts as a structural binder and helps the dough trap air pockets, which is crucial for oven spring.
- How to use: For every 1 cup of coconut flour, use 1 tablespoon of flaxseed meal and 1 tablespoon of psyllium husk. This combination helps create a dough that holds air pockets and allows for better expansion during baking.
- Why it works: Psyllium husk adds elasticity and moisture retention, which helps the dough rise effectively. Together with flaxseed meal, it gives the dough the strength to hold air and expand, allowing the bread to rise during baking and achieve a better oven spring.
2. Hydrate Flaxseed Meal Properly to Maximize Rise
Flaxseed meal is highly absorbent, which means it needs a good amount of liquid to achieve the right consistency. Without proper hydration, the dough can become too dry and dense, inhibiting rise and reducing the oven spring. By hydrating the flaxseed meal properly, it forms a gel-like texture that helps the dough become more cohesive, elastic, and ready to rise.
- How much liquid to use: For every 1 tablespoon of flaxseed meal, add 2-3 tablespoons of water or almond milk (or any other liquid). If you use larger quantities of flaxseed meal, you may need to increase the liquid proportionally.
- Why it works: Flaxseed meal absorbs the liquid and forms a gel, which binds the dough together and gives it a more elastic texture. The additional hydration allows the dough to expand better during baking, leading to a successful oven spring and a lighter crumb.
3. Use Eggs to Lighten the Dough and Enhance Structure
Flaxseed meal alone can create a dense texture, which may weigh down the dough and hinder its rise. To counteract this, eggs are a crucial ingredient in low-carb bread recipes. Eggs help lighten the dough by providing moisture, structure, and lift, giving the bread a more airy texture while ensuring a good oven spring.
- How to use: For every 1 cup of coconut flour and 1 tablespoon of flaxseed meal, add 3-4 eggs, depending on the consistency of your dough. More eggs may be needed to provide additional lift and moisture.
- Why it works: The proteins in eggs help bind the dough and create air pockets, which allow the dough to expand during baking. The added moisture from the eggs also counterbalances the absorbent nature of both flaxseed meal and coconut flour, helping the dough rise effectively.
4. Flaxseed Meal’s Moisture-Retaining Properties Aid Oven Spring
One of the key benefits of flaxseed meal is its ability to retain moisture. When used in low-carb bread, flaxseed meal helps keep the dough moist and tender, which is essential for ensuring proper rise and preventing the bread from becoming dry or overly dense.
- How it works: Flaxseed meal forms a gel when hydrated, which helps the dough retain moisture during baking. This moisture retention keeps the dough elastic and able to expand in the oven. Without sufficient moisture, the dough can dry out, resulting in a heavy, flat loaf with minimal rise.
- Why it works: Moisture retention is critical for oven spring. The more elastic and hydrated the dough is, the better it will expand in the oven, leading to a fluffier texture and improved rise. Flaxseed meal helps ensure that the bread stays moist without compromising its structure.
5. Monitor Baking Time and Temperature for Optimal Oven Spring
Flaxseed meal can add some heaviness to the dough, so it’s essential to bake at the correct temperature to achieve the desired rise. If the temperature is too low or the bread is baked for too long, the bread can become dense and dry, losing its oven spring. A proper oven temperature allows the dough to expand quickly in the first few minutes of baking, giving you a nice rise and fluffy texture.
- What to do: Preheat your oven to 375°F (190°C) and bake the bread for 30-45 minutes. After about 20 minutes, check the bread to ensure it is rising properly. If it starts to brown too quickly, you can cover it loosely with aluminum foil to prevent over-browning.
- Why it works: A high oven temperature ensures that the bread rises rapidly in the first few minutes, causing the gases in the dough to expand and create a fluffy texture. However, you need to bake it long enough to allow the inside to cook through without collapsing under its own weight.
How Flaxseed Meal Contributes to Oven Spring in Low Carb Coconut Flour Bread
Flaxseed meal can contribute significantly to oven spring in low-carb coconut flour bread, but it requires careful management. Here’s how to use it effectively:
- Combine with Psyllium Husk: Psyllium husk adds structure and elasticity to the dough, helping to trap air pockets and promote rise during baking.
- Hydrate Properly: Flaxseed meal needs extra liquid to activate its gelling properties and ensure the dough remains elastic and able to expand.
- Use Eggs for Lift: Eggs help lighten the dough, enhance moisture, and add structure, allowing the bread to rise more effectively.
- Moisture Retention: Flaxseed meal helps keep the dough moist, which prevents it from becoming dry or dense, leading to better oven spring.
- Bake at the Right Temperature: Bake at 375°F (190°C) for optimal oven spring, ensuring the dough expands properly in the first few minutes of baking.
By using flaxseed meal with the right balance of hydration, structure-building ingredients like psyllium husk, and moisture-retaining ingredients like eggs, you can achieve a low-carb coconut flour bread that has a lighter texture, better rise, and a successful oven spring.
What Type of Pan Should I Use to Help My Low Carb Bread Rise (With Coconut Flour)?
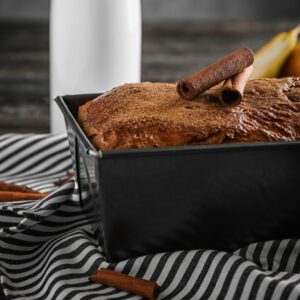
When baking low carb bread with coconut flour, choosing the right pan is essential to getting a good rise and ensuring a light, fluffy texture. Coconut flour is highly absorbent and can create a denser dough compared to other low carb flours, so the type of pan you use plays a significant role in the bread’s ability to rise properly during baking. Here are some tips on selecting the best pan to achieve an optimal oven spring and rise for your coconut flour bread.
1. Use a Dark Metal Pan for Faster and Even Baking
Just like with almond flour, dark metal pans (black, dark brown, or other dark-colored metal) are the best choice for baking low carb bread with coconut flour. Dark pans absorb and retain heat better than light-colored pans, allowing for faster and more even cooking.
- Why it works: Dark metal pans heat up more quickly and distribute heat evenly, promoting a faster rise. The initial heat helps form a stable crust while allowing the dough to expand and rise more effectively in the first few minutes of baking. This is important for coconut flour bread, which can otherwise have a tendency to bake more slowly due to its dense, absorbent nature.
- How to use: Choose a dark metal loaf pan made from materials like carbon steel or heavy-duty aluminum. These pans are great for ensuring even heat distribution and a better rise.
2. Opt for a Loaf Pan with High Sides
Since coconut flour dough tends to be thick and absorbent, using a loaf pan with high sides is essential to ensure the dough rises properly. If the pan is too shallow or wide, the dough may spread out too much, leading to a flatter loaf that doesn’t rise as much during baking.
- Why it works: A pan with high sides helps confine the dough, encouraging it to rise upward rather than spread out. This creates a taller loaf with better volume and texture. For coconut flour bread, it’s important to give the dough enough support to rise without collapsing.
- How to use: Choose a loaf pan with sides that are at least 3-4 inches tall. This provides enough room for the dough to rise and helps to create a loaf with a good structure and crumb.
3. Preheat Your Pan for Better Initial Rise
Some bakers recommend preheating the pan before adding the dough. While it’s not strictly necessary, preheating the pan can give your dough an initial rise boost when it hits the hot surface, which is especially helpful when baking with coconut flour. This helps the dough expand quickly in the first few minutes of baking, which is crucial for oven spring.
- Why it works: Preheating helps create an initial burst of heat when you place the dough into the pan. This rapid rise during the first few minutes of baking allows the dough to form a strong structure, trapping air bubbles and contributing to a better rise.
- How to use: Preheat your pan in the oven at the same temperature you plan to bake the bread (usually around 350°F to 375°F) for 10 minutes before adding the dough. Once preheated, carefully pour the dough into the hot pan and return it to the oven immediately.
4. Consider Parchment Paper for Easy Release
Because coconut flour-based doughs can be a bit delicate and sticky, it’s a good idea to line your pan with parchment paper. This helps prevent the bread from sticking to the pan and ensures a smooth removal once the bread is baked.
- Why it works: Parchment paper provides a non-stick surface and makes it easier to lift the bread out of the pan after baking, preventing it from breaking apart or getting stuck to the sides.
- How to use: Line the bottom and sides of your loaf pan with parchment paper, leaving an overhang so you can easily lift the bread out. This is especially useful if you’re using a high-sided pan.
5. Avoid Glass or Ceramic Pans
While glass or ceramic pans may be suitable for some types of bread, they are generally not the best choice when baking with coconut flour. These materials heat more slowly than dark metal pans, which can result in uneven baking and a less impressive oven spring.
- Why it doesn’t work as well: Glass and ceramic pans are poor conductors of heat compared to dark metal pans. This slower heat transfer can cause the bread to bake too slowly, leading to a denser loaf that doesn’t rise as much in the oven.
- How to use: If you must use a glass or ceramic pan, you may need to adjust your baking time and temperature slightly. However, be aware that the oven spring may be less dramatic than with a dark metal pan.
6. Consider a Pullman Loaf Pan for a Uniform Shape
For a more uniform and beautifully shaped loaf, you might also consider using a Pullman loaf pan. This is a rectangular pan with a fitted lid that helps create a smooth, even rise and a perfect square-shaped loaf. This type of pan is especially helpful for coconut flour bread, which can sometimes rise unevenly or have a rougher texture.
- Why it works: The lid on a Pullman pan helps keep the loaf from expanding too much horizontally, encouraging it to rise evenly and straight up. This can help control the loaf’s shape and ensure it rises evenly.
- How to use: Simply cover the dough with the Pullman pan lid before baking. Be sure to follow the manufacturer’s instructions for preheating or covering the pan, as it may vary slightly from regular loaf pans.
Best Pan for Low Carb Coconut Flour Bread
To achieve the best rise and oven spring in your coconut flour bread, here’s a quick rundown of the best pan choices and tips:
- Use a dark metal pan: Dark-colored metal pans absorb and retain heat better, which promotes faster and more even rising.
- Choose a loaf pan with high sides: High sides will help the dough rise upward, creating a taller, more structured loaf instead of a flat one.
- Preheat your pan: Preheating the pan helps the dough rise quickly when placed into the hot pan, promoting a better oven spring.
- Use parchment paper: Line the pan with parchment paper for easy release and to prevent the bread from sticking to the pan.
- Avoid glass or ceramic pans: These materials heat too slowly and can result in uneven baking, leading to a denser loaf.
- Consider a Pullman pan: If you prefer a uniform shape and even rise, a Pullman loaf pan can help create the perfect loaf of coconut flour bread.
By choosing the right pan and following these tips, you’ll improve your chances of baking a light, fluffy, and well-risen coconut flour bread with a great oven spring.
How Can Proofing Help Achieve Oven Spring in Low Carb Coconut Flour Bread?
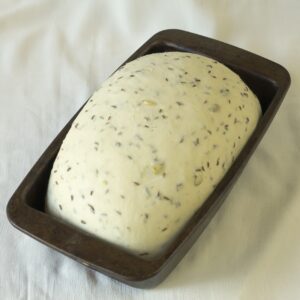
Proofing, or allowing the dough to rest before baking, is just as important for coconut flour bread as it is for other low carb breads. While coconut flour is highly absorbent and does not require yeast for fermentation like traditional breads, proofing still helps the ingredients, particularly the coconut flour, eggs, and binding agents like psyllium husk or flaxseed meal, to fully hydrate and activate. This is essential to creating a dough that rises properly in the oven and achieves a great oven spring.
How Proofing Helps with Oven Spring in Coconut Flour Bread:
1. Rest Dough Before Baking for Hydration and Structure:
Allowing your dough to rest for a period (typically 15-30 minutes for coconut flour bread) gives the ingredients time to fully hydrate, particularly the coconut flour, which absorbs a significant amount of moisture. Hydrating the dough properly helps create a cohesive structure, which is necessary for achieving a good rise during baking.
- Why it works for coconut flour: Coconut flour is much more absorbent than other low carb flours like almond flour. This means it requires more time to fully absorb moisture and thicken. Proofing allows the coconut flour to hydrate fully, helping the dough firm up slightly and creating the necessary structure for a good rise in the oven.
- How to do it: After mixing your dough, cover it and let it rest for 15-30 minutes at room temperature. This gives the coconut flour time to absorb the moisture from the other ingredients and form a firmer, more cohesive dough.
2. Don’t Over-Proof:
While proofing is important, it’s equally important not to over-proof the dough. If you let the dough sit for too long, the structure formed by binding agents like psyllium husk and eggs can break down, resulting in a flatter, denser loaf. Over-proofing coconut flour dough, which already holds a lot of moisture, can also make it too wet and prevent it from rising effectively.
- Why over-proofing is an issue: If you let coconut flour dough rest for too long, it can become too moist and lose its elasticity, which makes it difficult to rise properly in the oven. The structure from binding agents like psyllium husk can weaken, causing the loaf to spread out too much instead of rising up.
- How to avoid over-proofing: Stick to a proofing time of 15-30 minutes for coconut flour bread. This ensures the dough is hydrated enough without becoming too wet or overly loose, and it helps maintain the structure needed for oven spring.
3. How Long Should I Proof Low Carb Coconut Flour Dough?
Coconut flour requires a longer proofing time compared to almond flour because it is more absorbent. Giving the dough enough time to fully hydrate is essential for a successful rise.
- Rest time for coconut flour bread: Allow the dough to rest for 15-30 minutes to ensure that the coconut flour absorbs the moisture and the dough firms up enough to rise properly in the oven.
What Are Some Tips for Proofing Coconut Flour Dough?
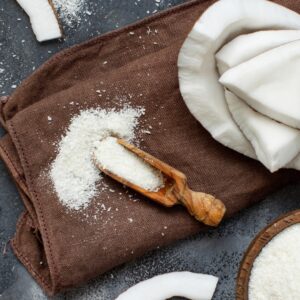
1. Handle the Dough Gently: Overworking coconut flour dough can break down its structure and result in a denser loaf. Unlike wheat flour dough, which benefits from kneading, coconut flour dough doesn’t require heavy mixing or kneading.
- How to do it: Mix the dough gently until the ingredients are just combined. Avoid kneading or overmixing, as coconut flour dough tends to become dense and sticky if overworked.
2. Cover the Dough While Proofing: Covering the dough during proofing prevents the surface from drying out and forming a crust before baking. This ensures that the dough retains enough moisture for a good rise in the oven.
- How to do it: Cover the dough with a damp cloth or plastic wrap while it rests at room temperature.
3. Proof at Room Temperature: Proof your coconut flour dough at a consistent room temperature. Too warm or too cold can cause uneven hydration, which will affect the dough’s rise and texture.
- How to do it: Proof the dough at room temperature (around 70°F or 21°C). Avoid placing the dough in a hot or cold environment.
4. Hydration is Crucial: Because coconut flour is so absorbent, it’s essential to ensure your dough has enough moisture to hydrate properly. If the dough feels too dry, add a little more liquid. This is particularly important for coconut flour bread, as it tends to dry out quickly.
- How to do it: Add a little more water, almond milk, or another liquid if the dough seems too thick or dry. Coconut flour dough should be thick but not too dry or crumbly.
Why Proofing Matters More for Coconut Flour Bread:
1. Coconut Flour’s High Absorbency: Coconut flour is extremely absorbent, which means it needs more time to fully hydrate. If you don’t give it enough time to soak up the moisture, the dough will be too dry and not rise properly. Proofing helps the coconut flour absorb moisture, giving the dough the structure it needs to hold air and rise in the oven.
2. Binding Agents Need Activation: Ingredients like psyllium husk, eggs, and flaxseed meal need time to fully activate and bind the dough together. Proofing ensures these ingredients work effectively to provide the structure and elasticity required for oven spring.
3. Proper Hydration Leads to Better Oven Spring: Coconut flour dough needs to be properly hydrated in order to expand in the oven. Proofing helps to achieve the right moisture level, allowing the dough to rise and expand as it bakes.
Does Baking at a Higher Temperature Help With Oven Spring?
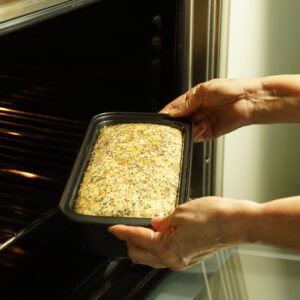
Yes, baking at a higher temperature helps coconut flour bread achieve a good oven spring. When you place the dough in a hot oven, the heat causes the gases in the dough to expand rapidly, resulting in a quick rise in the first few minutes of baking.
- Why it works: A high temperature helps the dough to rise quickly at the beginning, which is key to achieving oven spring. Coconut flour bread benefits from a fast rise, as it helps create a lighter, airier texture.
- How to do it: Preheat your oven to 375°F (190°C). Bake the bread at this higher temperature for the first 10-15 minutes to get a good initial rise, then reduce the temperature to 350°F (175°C) for the remainder of the baking time to ensure the bread cooks through without burning.
Proofing for Oven Spring in Coconut Flour Bread
Proofing is an essential step in achieving a good oven spring for coconut flour bread. Here’s a quick guide for proofing coconut flour dough:
- Proof for 15-30 minutes to allow the coconut flour to fully absorb the moisture and form a cohesive dough.
- Don’t over-proof, as it can cause the dough to become too wet and lose its structure.
- Handle the dough gently to avoid breaking down the structure and creating a denser loaf.
- Cover the dough while proofing to retain moisture.
- Proof at room temperature for the best results.
By following these proofing guidelines, you can achieve a light, fluffy coconut flour bread with a great oven spring and texture. Proofing allows the dough to hydrate fully, which is critical for getting the rise and structure needed in low carb baking.
What Should I Do if My Low Carb Coconut Flour Bread Doesn’t Rise Properly?
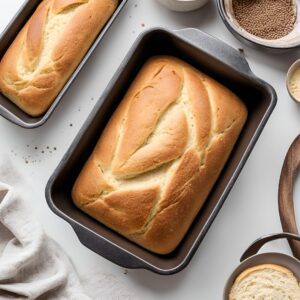
If your low carb coconut flour bread isn’t rising as expected, don’t worry! There are several ways to troubleshoot and improve the rise. Coconut flour is highly absorbent and behaves differently from other low-carb flours like almond flour, so sometimes it requires specific adjustments. Here’s how to get your coconut flour bread to rise beautifully:
1. Add More Leavening Agents (Baking Soda or Baking Powder)
Coconut flour doesn’t contain gluten, so it relies heavily on leavening agents (baking soda, baking powder, or eggs) to help it rise. If your bread isn’t rising properly, you might need to increase the amount of baking soda or baking powder.
How to fix it:
- For most coconut flour bread recipes, try adding an extra 1/4 to 1/2 teaspoon of baking soda or baking powder per cup of coconut flour.
- Ensure the ratio of leavening agents is properly balanced with other ingredients.
Why it works:
- Baking soda and baking powder release gas bubbles during baking, which help lift the dough and create a lighter texture. Since coconut flour is dense and absorbs moisture quickly, more leavening can aid in a better rise.
2. Increase Hydration (Add More Liquids)
Coconut flour is extremely absorbent and requires more liquid than other flours. If your dough is too dry or crumbly, it can prevent the bread from rising and expanding.
How to fix it:
- If your dough feels too dry or thick, add an extra tablespoon or two of liquid (like water, almond milk, or eggs). You may also need to adjust the flour measurements since coconut flour can vary in absorbency depending on the brand.
- Make sure to add enough moisture so the dough can expand and hold air pockets during baking.
Why it works:
- Proper hydration is crucial for coconut flour to absorb enough liquid and form a dough that’s cohesive and can rise effectively. If the dough is too dry, it won’t trap the air needed for a good oven spring.
3. Incorporate More Air Into the Dough
Coconut flour’s dense, heavy texture can make it harder for the dough to rise. Incorporating air into the dough is essential for a light, airy loaf.
How to fix it:
- Whisk the dry ingredients (such as coconut flour, baking powder, and salt) thoroughly before adding the wet ingredients. This helps ensure that the leavening agents are evenly distributed and helps aerate the flour.
- Mix the wet ingredients gently into the dry ingredients. Be careful not to overmix, but ensure everything is well-combined.
Why it works:
- Air pockets in the dough expand during baking, contributing to a lighter loaf. Coconut flour’s absorbent nature means it doesn’t naturally trap air like wheat flour does, so it’s crucial to incorporate enough air into the dough to help with rising.
4. Rest Your Dough (Proofing)
Coconut flour benefits from resting or proofing, as it allows the ingredients—especially the flour and eggs—to fully hydrate. This ensures a more cohesive dough and helps the bread rise better.
How to fix it:
- Let the dough rest for 15-30 minutes before baking. This gives the coconut flour time to absorb all the liquid, firm up slightly, and become more cohesive.
Why it works:
- Resting the dough allows it to fully hydrate and solidify. This hydration is necessary for forming a dough that holds air pockets and rises properly in the oven.
5. Don’t Overmix the Dough
Overmixing the dough can cause it to become dense and heavy, which will prevent the bread from rising properly.
How to fix it:
- Gently mix the dough until just combined. Don’t overwork it, as this can break down the structure and prevent the dough from expanding.
- After mixing, allow the dough to rest for a few minutes to let it firm up before placing it in the oven.
Why it works:
- Gentle mixing ensures that the dough maintains its structure and air pockets, which is essential for achieving oven spring. Overmixing can result in a dense, heavy loaf that won’t rise properly.
6. Use a Pan with High Sides
If your coconut flour bread spreads too much and doesn’t rise vertically, the problem could be your pan. A pan with high sides will help keep the dough from spreading too thin, allowing it to rise upwards instead.
How to fix it:
- Use a loaf pan with high sides to encourage the dough to rise vertically. A standard 9×5-inch loaf pan is usually ideal for most coconut flour bread recipes.
Why it works:
- A pan with higher sides helps keep the dough from spreading outward, allowing it to rise upwards and hold its shape during baking.
7. Check Your Oven Temperature
Baking at the wrong temperature can prevent your coconut flour bread from rising properly. If the oven is too cool, it won’t give the dough the initial burst of heat it needs to rise. Too high, and the bread may brown too quickly before it has time to rise.
How to fix it:
- Preheat your oven to 350°F (175°C) for most coconut flour bread recipes. Some recipes may benefit from a slightly higher temperature (375°F or 190°C) for the first 10-15 minutes to encourage oven spring, then reduce the temperature to bake through without over-browning.
Why it works:
- A higher temperature helps the bread rise quickly in the first few minutes, promoting oven spring. The heat expands the gases in the dough, resulting in a lighter, fluffier texture. Lowering the temperature later ensures even baking and prevents burning.
8. Add Extra Binding Agents (Eggs, Psyllium Husk, or Gelatin)
Coconut flour dough can sometimes lack structure if the right binding agents aren’t included. Eggs are often used in coconut flour bread recipes, but adding extra psyllium husk or gelatin can improve the dough’s structure and help it hold its rise.
How to fix it:
- If your dough is too crumbly, try adding an extra egg or a tablespoon of psyllium husk or gelatin powder to the mixture. Psyllium husk, in particular, can help create a more elastic dough that traps air more effectively.
Why it works:
- Eggs provide moisture and structure, while psyllium husk or gelatin adds elasticity and binding power. These ingredients help the dough hold its shape and rise properly.
How to Fix Your Low Carb Coconut Flour Bread’s Rise
If your low-carb coconut flour bread isn’t rising as expected, there are several simple adjustments you can make to improve the texture and achieve a perfect loaf. Follow these steps to troubleshoot and fix common issues:
- Add more leavening agents like baking soda or baking powder.
- Increase hydration by adding more liquid to the dough.
- Incorporate air into the dough without overmixing.
- Rest the dough (proof) for 15-30 minutes before baking.
- Use a pan with high sides to encourage vertical rise.
- Bake at the right temperature to help achieve oven spring.
- Add extra binding agents like eggs, psyllium husk, or gelatin for more structure.
With these fixes, you can achieve a lighter, fluffier coconut flour bread with a perfect rise every time!
What Other Low Carb Bread Articles Might You Enjoy?
Here are a few:
LOW CARB BREAD’S SECRET WEAPON: SOURDOUGH FERMENTATION
SOURDOUGH LOW CARB BREAD AS A HOLIDAY GIFT OPTION
10 LITTLE KNOWN FACTS ABOUT SOURDOUGH LOW CARB BREAF
SOURDOUGH LOW CARB BREAD; BODYBUILDING SECRET WEAPON
SOURDOUGH LOW CARB BREAD; A PROBIOTIC POWERHOUSE
10 SOURDOUGH LOW CARB BREADS PAIRED WITH NON ALCOHOLIC WINES
SOURDOUGH LOW CARB BREAD; HOW BIFIDOBACTERIA BOOST YOUR HEALTH
FYI: SOURDOUGH MEDICAL STUDIES AND REVIEWS:
Here they are:
- Does Sourdough Bread Provide Clinically Relevant Health Benefits?: Link: https://pmc.ncbi.nlm.nih.gov/articles/PMC10399781/
- The Sourdough Microbiome : Link: https://asm.org/articles/2020/june/the-sourdough-microbiome
- Sourdough Microbiome Comparison and Benefits: Link: https://pmc.ncbi.nlm.nih.gov/articles/PMC8306212/
- Nutritional Benefits of Sourdough; Systematic Review : Link: https://pubmed.ncbi.nlm.nih.gov/36811591/
- Use of sourdough in low FODMAP baking : Link: https://pubmed.ncbi.nlm.nih.gov/29932101/
Disclaimer:
All information provided on this website regarding the health benefits of sourdough low carb bread is intended for educational purposes only. The content presented is not meant to be taken as specific medical advice for any individual. It should not be considered a replacement for professional medical guidance or treatment. If you have any health concerns, especially related to diabetes, pre-diabetes, or any other medical condition, please consult with a healthcare professional immediately.
🔥 UNLOCK MORE RECIPES STARTER + MEMBERSHIP – Only $99 CAD! 🔥
Get a second starter with your membership – the exclusive membership recipes use 2 different low-carb feedings to bake the 3 different styles of breads and baked goods (weight loss, low-carb lifestyle maintenance, fast and easy discard recipes) that will transform your baking game beyond what your current starter can achieve!
💰 PRICING: Regular Price: $198 CAD Today Only: $99 CAD (Only $99 CAD!)
SINLESSSOURDOUGH.COM
Click the Starter + Membership Box
Your Discounted Membership Includes:
🥖 1849 San Francisco Gold Rush Dehydrated Starter: Scientifically validated starter shipped free to your door!
📦 FREE Shipping: Your starter ships to you at no extra cost
🎥 25+ Instructional Video Trainings: Master Keto & Low-Carb Sourdough Baking with comprehensive video lessons
📚 3 E-Sinless Sourdough Cookbooks: Easy-to-follow sourdough recipes for your low-carb lifestyle
📖 3 E-Keto Low-Carb Cookbooks: Delicious low-carb recipes to complement your baking
🗓️ E-28-Day Keto Kickstarter Journal & Planner: Stay on track with your low-carb journey
📝 Keto Low-Carb E-Cheat Sheets & Quick Guides: Shortcuts for perfect baking every time
🍞 Training for 3 Styles of Keto & Low-Carb Sourdough: Learn recipes for weight loss, lifestyle maintenance, and easy discard recipes
💬 Exclusive Community Access: Share tips, ask questions, and get expert support from fellow bakers
🚀 DON’T MISS OUT – GRAB IT FOR Only $99 CAD NOW! 🚀
Transform Your Baking Today:
- Visit sinlesssourdough.com™
- Click “Starter + Membership”
- Proceed to the purchase page
- Enter code: SINLESS50
- Complete checkout and START BAKING guilt-free sourdough immediately!
SINLESSSOURDOUGH.COM
Click the Starter + Membership Box




Responses