
STARTER GUIDE: START HERE

SINLESS SOURDOUGH™
The Complete Sourdough Starter Guide
Where Ancient Art Meets Low Carb Science
PERSONAL USE ONLY — MAY NOT BE FORWARDED, SHARED, OR DISTRIBUTED · © 2026 Sinless Sourdough™ by Shari MAC
Sinless Sourdough works best when the system is followed consistently from the start. This guide is your foundation. Read it before you begin.
About Your Starter
🎥
Follow on YouTube for More Keto Low-Carb Recipes
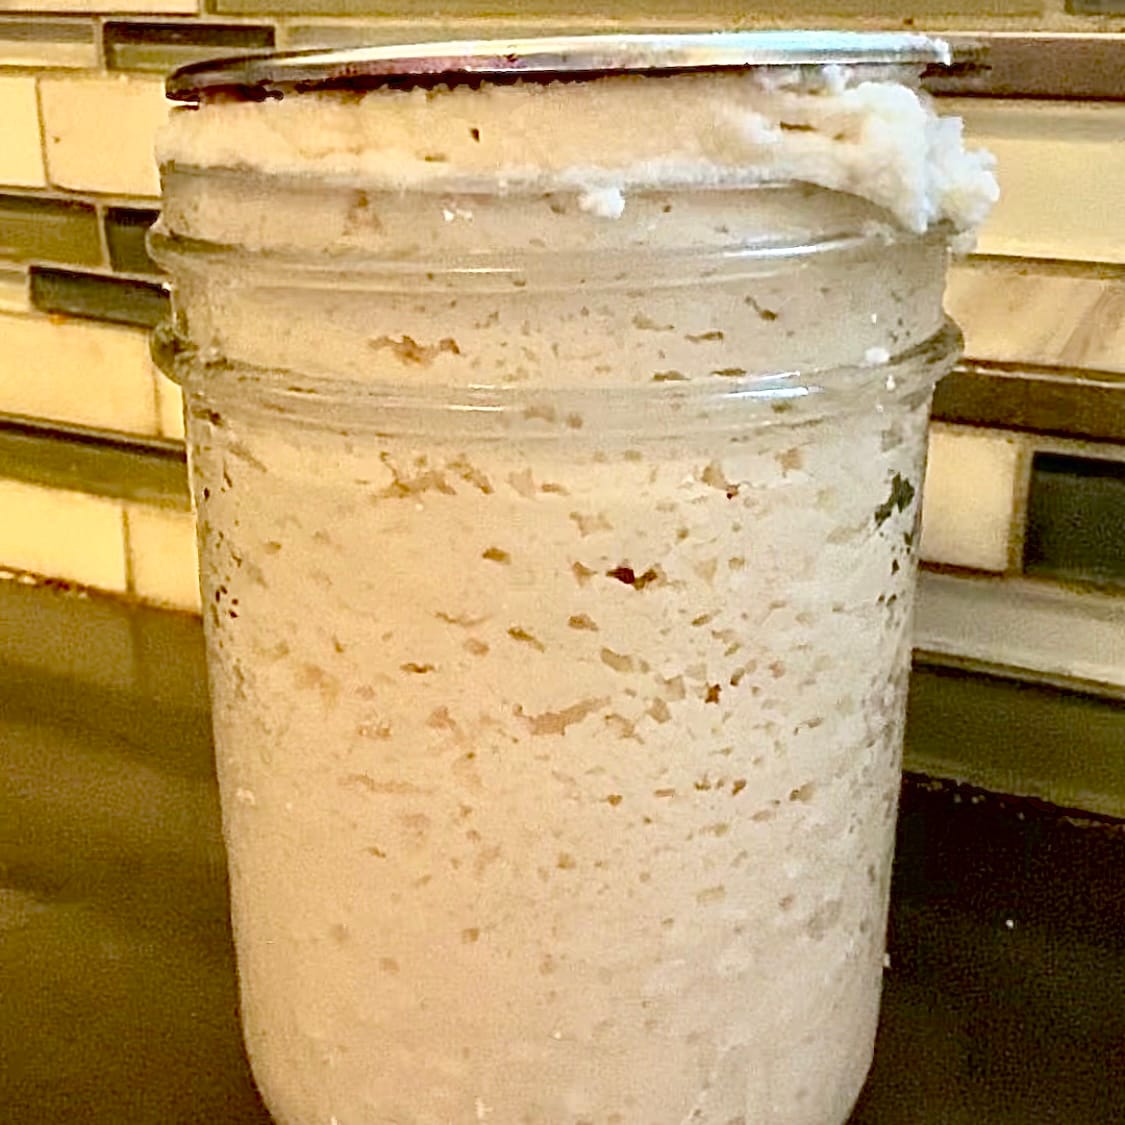
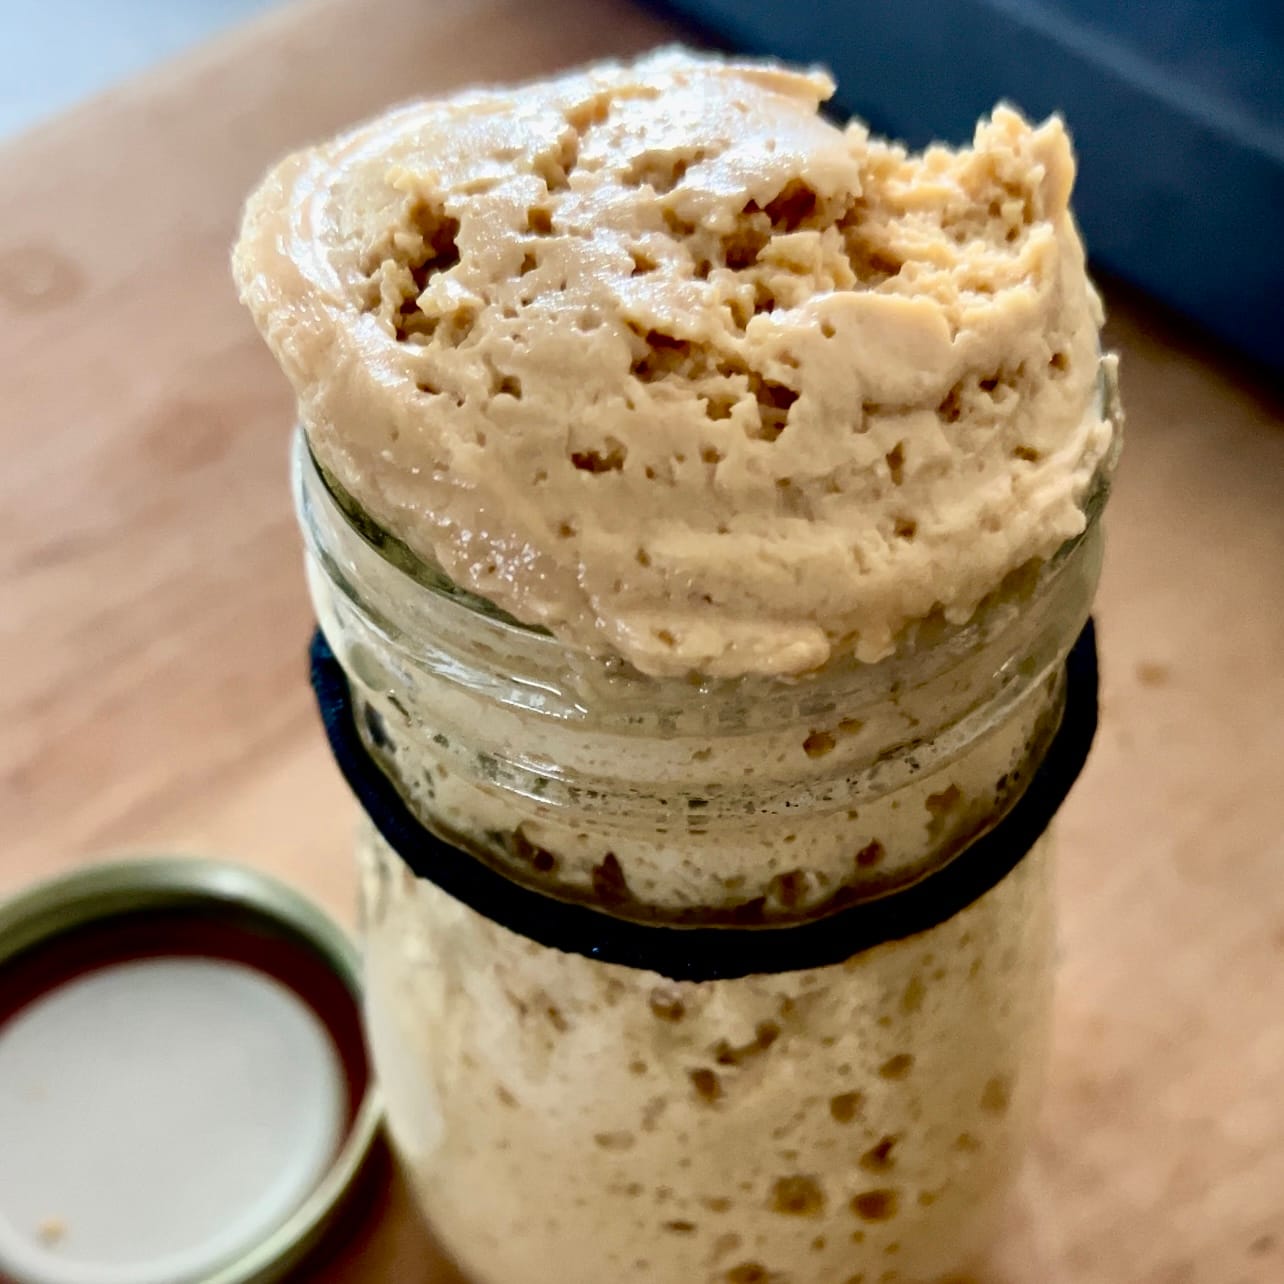
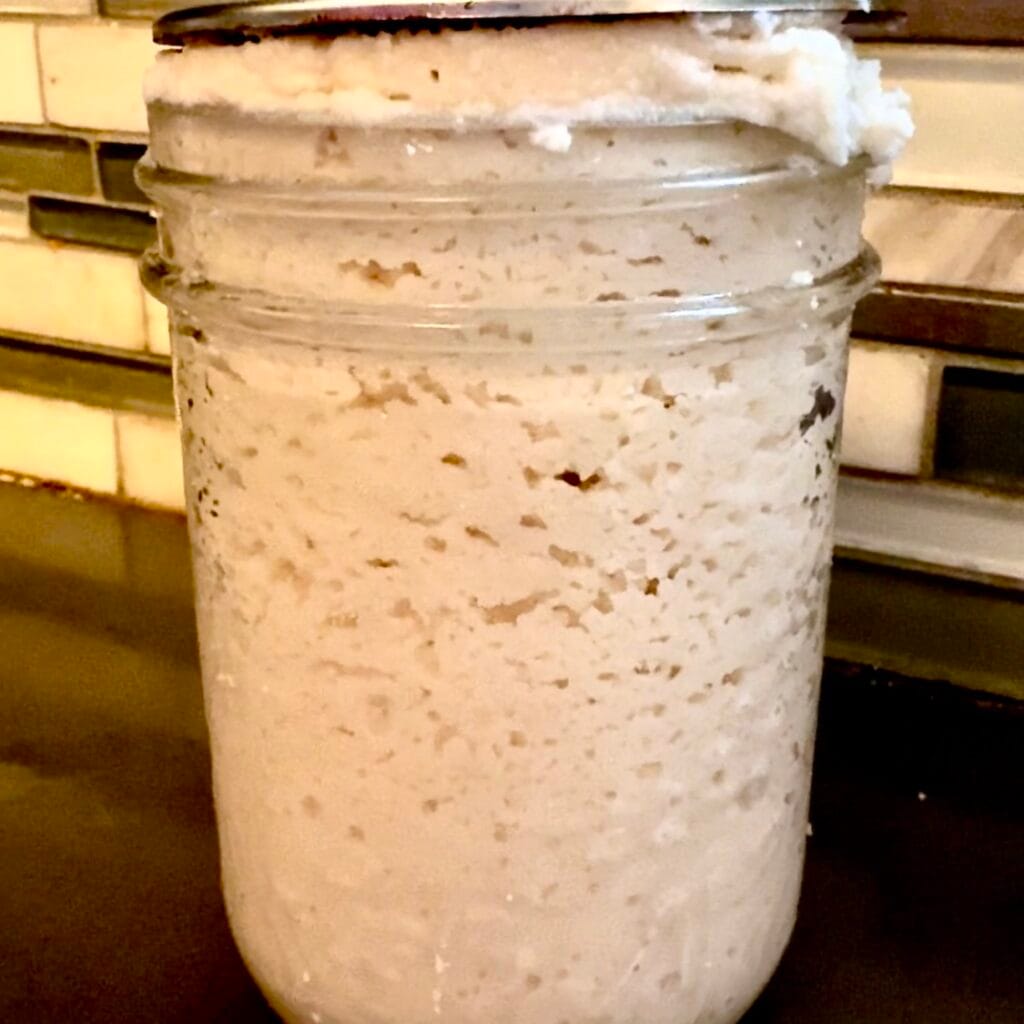
What Do the Starters Look Like?
You may see your starter look slightly different depending on how it’s fed. This is normal.
Mindset Reset
This Is NOT Traditional Sourdough
❌ Do NOT Expect
- Big doubling in a few hours
- Predictable rise and fall like wheat starters
- Smooth wheat dough texture
✅ DO Expect
- Slower fermentation at first
- Bubbles throughout
- A thick spoonable texture
- A grainy appearance between feedings
- Strength that builds over several batches
they wake up strong.”
Before You Begin
Quick Start Checklist
Equipment
2 cup / 500mL glass jar · Loose-fitting lid · Chopstick or spatula · Measuring spoons
Choose ONE Feeding Path
No Gluten
Blanched almond flour + coconut flour
NOT almond meal with skins
With Gluten
Vital wheat gluten + oat fiber
Critical and Non-Negotiable
Water Matters
Before you begin please read Your Low Carb Sourdough Starter and the Magic of Water so you can choose the right water.
The Rule
- Use spring water, suitable filtered water, or suitable well water
- Target pH: 6.8–7.5
- Once chosen — do not change your water
✅ Spring Water — Preferred
Chlorine-free · Naturally mineralized · Typically near neutral pH · Plastic bottles do not affect fermentation
⚠️ Filtered Water — Acceptable With Care
Must be chlorine-free · Must not be highly alkaline · Carbon-filtered systems preferred
✅ Well Water — Can Be Excellent
Untreated · Not softened · Free of chlorine · pH 6.8–7.5 · Naturally mineralized
❌ Do NOT Use
Tap water · Reverse osmosis · Distilled · Softened well water · Alkaline water (pH 8–10) · Electrolyte-enhanced water
If pH Is Unknown or Water Is Alkaline
Add 1 literal drop — not a teaspoon — of fresh lemon juice or raw apple cider vinegar per 1 cup (240ml) of water.
Why Jar Size Matters
A 500mL / 16oz glass jar is required for the first several months.
Low-carb flours behave differently than wheat flour. The mixture must be thick enough to trap carbon dioxide bubbles. The feeding amounts are calibrated specifically for this jar size.
500mL ✅
Feeding amounts calibrated correctly. Batter stays thick enough to trap CO₂.
Larger Jar ❌
Mixture spreads too thin. Gas escapes. Microbial density diluted. Slows acidification.
The Sinless System Made Easy
Baking Batches — Not Days
Sinless Sourdough is built on baking batches not on counting days. A baking batch is one complete cycle:
Feed your starter every 12 hours
Allow it to rise to the top of the jar
Use 1 cup (or ½ cup) in a recipe
Immediately feed the remaining starter
Build it back to the top again
Build it. Bake it. Feed it. Repeat.
That is the Sinless System.
First Mix
Activating Your Starter
Step 1 — Add dehydrated starter to a clean 500mL jar
Step 2 — Add 1 tablespoon EACH of your chosen flour blend
Step 3 — Add spring water 1 tablespoon at a time
Step 4 — Mix until thick pancake-batter consistency
Step 5 — Cover loosely — do NOT seal airtight
Where to Place Your Starter
✅ Good Locations
Near (not on) the stove · Beside a warm appliance · Oven with light on — no heat · On top of the fridge
❌ Avoid
Windows · Vents · Exterior walls
Activation Timeline
What to Do Every 12 Hours (No Discarding!)
Day 1 (Morning): First Mix — Add dehydrated starter + 1 tbsp each flour (2 tbsp total) + spring water. Mix to thick pancake-batter consistency. Cover loosely.
Day 1 (Evening – 12 Hours Later): Feed — Add 1 tbsp each flour (2 tbsp total) + spring water directly to the jar. Stir thoroughly.
Days 2 to 4 (Every 12 Hours): Keep Feeding — Repeat the 12-hour feeding (2 tbsp flour + water) directly into the jar without discarding anything.
When Is It Ready for Its First Bake? Once the starter builds up volume to near the top of your 500mL jar and shows consistent bubble activity, it’s ready for its first bake — this is where discarding comes in. See the Discarding section below.
💡
Formula to remember: 2 tbsp flour (1 tbsp each from your chosen path) + spring water to thick pancake-batter consistency, every 12 hours, straight into the jar. No discarding until the jar reaches the top for the first time.
A Common Point of Confusion
What “Discarding” Actually Means Here
Until your starter builds up to the top of the 500mL jar for the first time, you never discard — every feeding goes straight into the jar. The moment it first reaches the top, discarding starts, and it isn’t wasted starter — it’s the starter you bake with. This happens 4 separate times during activation, not just once at the end.
Every time the jar fills up: Scoop out ½ cup or 1 cup of your living starter — whatever your recipe calls for — and use it to bake. That’s your “discard.” It’s living starter going straight into real food, not going in the trash. A “batch” is simply one recipe’s worth: for example, a recipe using 1 cup of starter leaves you with about ¼ jar of starter remaining. From there, you feed it back up to the top of the jar, and once it reaches the top again, that’s your next bake.
The first 4 bakes — still on the 12-hour schedule: Build to the top → bake (discard) → feed the remaining starter every 12 hours → build back to the top → bake again. Repeat this cycle for a total of 4 bakes. Feeding stays at every 12 hours for all 4 — this is what the activation period actually consists of.
After your 4th bake: Your starter is now established. Switch from feeding every 12 hours to feeding once every 24 hours. Keep feeding daily — 1 tbsp each of your low-carb flours plus water — to build it back up to the top for your next bake.
💡
The ongoing rhythm: Once established, a daily feeding typically fills the jar back up in about a week — so if a recipe calls for 1 cup and you bake once a week, your feeding schedule and your baking schedule naturally line up.
Nutritional Values
For 1 (16oz) Jar of Living Starter
Use this as a general guide only. Your exact values will depend on brands used and number of feedings required in your kitchen.
Quick Reference
Recap
First Mix: dehydrated starter + 1 tbsp each flour (2 tbsp total) + spring water, mixed to thick pancake-batter consistency.
Feed every 12 hours (2 tbsp flour + water) until the jar reaches the top for the first time. No discarding yet.
Jar full? Bake: scoop out ½ cup or 1 cup for a recipe — that’s your “discard,” and it’s exactly what the FREE recipes are built around.
Feed the remaining starter every 12 hours to build back to the top, then bake again. Repeat this build-and-bake cycle for a total of 4 bakes — all still on the 12-hour schedule.
After your 4th bake, your starter is established: switch to feeding once every 24 hours. At that pace, the jar typically refills in about a week — a natural match for baking once a week with a 1-cup recipe.
12-hour feeding through your first 4 bakes, then 24-hour feeding to maintain.
The Final Word
This is not about perfection.
It is about consistency.
Your starter is alive.
It will behave differently in every kitchen.
Be consistent → stay curious → bake with love.
Welcome to Sinless Sourdough™.
© 2026 Sinless Sourdough™ by Shari MAC — All Rights Reserved
Personal use only — may not be forwarded, shared, or distributed in any form
sinlesssourdough.com · @theketobakingmechanic



Responses