
KETO SOURDOUGH DISCARD PUMPKIN LOAF

The Keto Baking Mechanic™ — Recipes
Keto Sourdough Discard Pumpkin Loaf
Where We Create, Tweak and Enhance
Keto and Low Carb Breads and Baked Goods
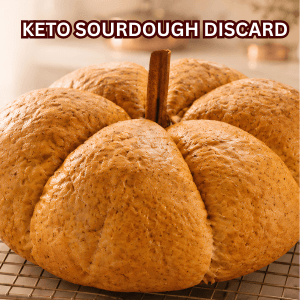
🎃 A Rustic, Bakery-Style Loaf Shaped Like a Pumpkin
This is the exact same keto sourdough discard dough behind our Bread Machine Bread — same vital wheat gluten, same living Biome Boss™ starter, same ultra-low net carbs — shaped and baked a completely different way. Instead of a machine pan, this loaf gets pulled, tucked, tied with butcher’s twine into segmented ridges, and baked in a Dutch oven, so it comes out of the oven looking genuinely like a small rustic pumpkin.
This keto pumpkin bread is a fabulous idea for your Thanksgiving table, or honestly any time during the autumn season when you want a loaf that looks as good as it tastes.
No arm-numbing kneading required — the stand mixer or your bread machine’s dough cycle does the mixing. From there, it’s all shaping and a proper Dutch oven bake for that deep, crackling, bakery-style crust.
A Note on “Keto” Labelling
This recipe is labelled keto because it’s designed to reduce blood sugar impact through ingredient choices and traditional fermentation methods — not because it requires strict dieting. Many people looking for healthier recipes, improved digestion, or more stable energy enjoy these recipes successfully, even if they don’t follow a ketogenic lifestyle.
This dough builds on early keto bread-machine baking, by integrating vital wheat gluten with hybrid sourdough fermentation for real structure and depth of flavour. Shaped this way and baked in a Dutch oven, this loaf takes on the crust and open crumb of true artisan bread while staying fully aligned with a flexible keto lifestyle.
Each slice provides substantial protein and remarkably low net carbs — and this time, it also makes a genuine centrepiece loaf.
🎥 Follow The Keto Baking Mechanic on YouTube for more flexible keto recipes: @theketobakingmechanic
https://sinlesssourdough.com/shop/
The Appeal
Why This Recipe Works
- Mega Protein: 17.75g per slice keeps you satisfied for hours
- Ultra Low Net Carbs: Only 2.25g per slice fits any keto plan
- Authentic Sourdough: Real fermentation creates complex flavours
- Bakery-Style Crust: The Dutch oven traps steam for a deep, crackling crust you can’t get from a machine pan
- Showstopper Shape: Butcher’s twine shaping creates a rustic pumpkin look, perfect for a fall table
- Thanksgiving-Ready: A fabulous keto pumpkin bread for the holiday table, or any bake during the autumn season
- Meal Prep Friendly: Freezes beautifully for up to 3 months
Perfect for keto dieters, sourdough enthusiasts, high-protein meal preppers, and anyone who wants a loaf worth putting in the centre of the table.
The Difference
What Makes This Loaf Different?
Traditional keto bread recipes often produce dense, crumbly loaves that taste more like sawdust than actual bread. This is the same high-protein, low-carb dough that solves that problem — but instead of letting a bread machine pan shape it, this version gets shaped by hand and finished in a Dutch oven.
The technique that makes it look like a pumpkin is simple but effective: tying butcher’s twine crisscrossed around the proofed dough presses in segmented grooves. Cutting the twine away before baking releases the shape, but the dough holds those grooves through its final rest and oven spring — giving you real pumpkin-style ridges with zero pumpkin in the ingredient list.
Key Differences
- Hand-shaped, not machine-shaped: Pull-and-tuck shaping builds surface tension the same way artisan bakers shape a boule
- Protein powerhouse: 213g protein in one loaf versus a typical 40–60g in regular keto bread
- Dutch oven steam: The trapped steam from the covered bake is what real bakery crusts are built on
- Visual impact: The twine-shaped ridges make this a loaf worth serving whole at the table
The Science
Why Does This Recipe Work?
- Mega Protein: 17.75g from vital wheat gluten plus eggs per slice
- Ultra Low Net Carbs: Only 2.25g per slice after 10.25g fibre
- Simple Ingredients: Everything available at regular grocery stores
- Meal Prep Friendly: Freezes for up to 3 months in individual slices
- Authentic Sourdough: Real fermentation creates complex, tangy flavour
- Structured Rise: A tea-towel-lined banneton and a controlled proof give a consistent shape and crumb every bake
Why It’s Valuable
Qualities of the Main Ingredients
Vital Wheat Gluten
- Exceptional Protein Source: Provides 75g protein per cup, making it one of the most concentrated plant-based proteins available
- Blood Sugar Stability: Pure protein with virtually zero net carbs may help support steadier glucose levels throughout the day
- Satiety Support: High protein content may help support fullness, potentially reducing cravings and unnecessary snacking between meals
Living Keto Starter (Biome Boss™)
- Fermentation By-Products: While baking reduces live microorganisms, the fermentation process leaves behind organic acids and compounds that may support digestive comfort and contribute to flavour complexity
- Improved Nutrient Absorption: Fermentation breaks down complex compounds, potentially making minerals like iron and zinc more bioavailable
- Enhanced Digestibility: The fermentation process pre-digests proteins and carbohydrates, which may make them easier for your body to process
Psyllium Husk Powder
- Digestive Regularity: Soluble fibre absorbs water and may support healthy bowel movements without adding net carbs
- Cholesterol Management: May help reduce LDL cholesterol levels when consumed regularly as part of a balanced diet
- Blood Sugar Support: May help slow glucose absorption, potentially reducing blood sugar spikes after meals
Xanthan Gum
- Shape Retention: Adds extra hold to the gluten network, which is exactly what lets this dough keep its twine-pressed pumpkin ridges through proofing and oven spring instead of relaxing back out
- Improved Crumb Consistency: Helps distribute moisture evenly, supporting a more uniform texture slice to slice
Why this combination works: the vital wheat gluten provides structure and protein while the living keto starter adds fermentation depth and authentic flavour. Psyllium husk powder binds everything together while supporting digestive comfort and blood sugar stability. Together, they create a bread that satisfies your cravings without sacrificing nutrition — sturdy enough to hold its shape through hand-shaping, twine-tying, and a Dutch oven bake.
Philosophy
About Measurements & Precision in Keto Sourdough
Traditional baking often teaches that cooking is art, but baking is science — meaning it must be precise. That’s why many bakers prefer weighing ingredients in grams instead of using cups. Keto sourdough baking does not follow that traditional model.
Sinless Sourdough™ is a living fermentation system. Your starter changes daily depending on hydration, environment, temperature, feeding cycle, and ingredient brand. Because of this, no two bakes are ever identical.
You may use cups. You may use grams. What matters most is hydration and dough behaviour.
Gram measurements listed in Sinless™ recipes are approximate reference points based on commonly available brands. However, ingredient density varies by:
- Brand
- Grind size
- How tightly ingredients are packed
- Humidity
- Storage conditions
This is especially true for oat fibre, vital wheat gluten, psyllium husks, and active starter. Your starter’s weight will vary from day to day depending on how aerated or dense it is when measured.
The goal is not to hit an exact number on a scale. The goal is to build proper dough structure.
Watch your shaggy dough. If it doesn’t pull together, add hydration one tablespoon at a time. If it’s too loose, adjust accordingly. Cups or grams — either works. Hydration awareness is what creates success. Sinless Sourdough™ is not about rigid precision. It’s about learning to read your dough.
What You’ll Need
Ingredients
This formula uses a dual-structure system: gluten for elasticity and psyllium + oat fibre for moisture control and crumb stability.
Wet Ingredients (Added First)
- 1 cup + 2 tablespoons (266 mL) spring water, warmed 30 seconds (lukewarm, 73–77°F / 23–25°C) — hydrates the dough and supports proper yeast activation
- 1 cup (240g) living Biome Boss™ discard (or Global Heritage Collection starter fed with blanched almond flour and coconut flour) — provides sourdough flavour and fermentation support
- 2 large eggs, room temperature, beaten before adding — strengthen structure and enrich the crumb
- 2 tablespoons (30 mL) olive oil or avocado oil — promotes tenderness and prevents dryness
Fibre Layer (Hydration Stage — Added Second)
- ½ cup (50g) oat fibre — adds bulk and lightness without net carbohydrates; improves crumb texture and balances hydration, but does not provide elasticity
- ¼ cup (28g) whole psyllium husks — hydrates to form a flexible gel that stabilizes the dough, improves gas retention, and supports sliceability
- 2 teaspoons xanthan gum — adds extra hold to the dough, helping it keep the twine-shaped pumpkin ridges through the second rise and oven spring
These are blended together and sprinkled over the wet ingredients to partially hydrate before gluten is added.
Remaining Dry Ingredients (Added Third)
- 1½ cups (180g) vital wheat gluten — forms the primary elastic structure of the loaf
- 1 teaspoon (6g) Celtic or Himalayan salt — enhances flavour and strengthens gluten development
- 1 teaspoon (4g) sugar — feeds the yeast during rise with negligible impact on final net carbs
- 1 tablespoon (15g) double-acting baking powder — adds lift and supports a lighter crumb
- 1 tablespoon (9g) SAF instant yeast — works alongside the starter for reliable rise and consistent structure
What You’ll Need
Equipment
- Stand mixer with dough hook, or bread machine: Used for mixing and kneading only — the dough/knead cycle, not a bake cycle
- Round banneton or round-bottom bowl: Lined with a clean tea towel for the first rise
- Butcher’s twine: 3 to 4 pieces, 100% cotton, for shaping the pumpkin ridges
- 5- to 6-quart Dutch oven with lid
- Parchment paper: To transfer the dough into the hot Dutch oven
- Oil spray bottle: Olive oil or avocado oil, for browning the crust
- Oven mitts: Non-negotiable — the Dutch oven will be extremely hot
- Digital kitchen scale: For precise measurements of vital wheat gluten and psyllium husk powder
- Liquid measuring cup: To measure water and starter accurately
- Serrated bread knife: Essential for clean slices without crushing the loaf
- Wire cooling rack: Allows air circulation for proper cooling and crust development
- Airtight storage container and freezer-safe bags
Let’s Bake
How Do You Make a Keto Sourdough Discard Pumpkin Loaf?
Phase 1: Mix the Dough
Step 1 — Add Wet Ingredients
- Pour in warmed spring water (lukewarm, 73–77°F / 23–25°C)
- Add living keto starter (fed within the last 12–24 hours)
- Add beaten eggs
- Add olive oil or avocado oil
Step 2 — Pre-Blend and Hydrate Fibre
In a small bowl, whisk together the oat fibre, whole psyllium husks, and xanthan gum. Sprinkle this blend evenly over the wet ingredients. Let sit 5 minutes to allow partial hydration — this improves gas retention and reduces collapse risk.
Step 3 — Add Remaining Dry Ingredients and Mix
Add the vital wheat gluten, salt, sugar, baking powder, and yeast. Mix and knead in a stand mixer with the dough hook until the dough is smooth, elastic, and slightly tacky — or run your bread machine’s dough cycle only. Either way, you’re stopping once you have raw, kneaded dough, not a baked loaf.
Phase 2: Shape It Like a Pumpkin
- Turn the dough out onto a lightly floured surface. Do about 6 to 8 pull-and-tucks, stretching the edges up and under the centre, to build surface tension across the top.
- Place the dough smooth-side down into a round banneton or round-bottom bowl lined with a clean tea towel. Let it rise for about 60 minutes.
- Remove the dough from the banneton, turning it right-side up so the smooth, tucked top is now facing up. Set aside.
- Lay 3 to 4 pieces of butcher’s twine on your work surface in a crisscross pattern. Set the dough on top of the twine.
- Bring the twine up and tie it in a knot at the top centre of the dough, pulling gently to press segmented ridges into the surface. Cut the strings away.
- Set the dough back into the tea-towel-lined banneton, top facing down again. Cover and let it rest while the oven preheats.
Phase 3: Preheat the Dutch Oven
Preheat your oven to 375°F (190°C). Place the empty Dutch oven, with its lid on, into the oven while it preheats, and let it heat for a full 30 minutes before baking.
Important: The Dutch oven will be extremely hot after 30 minutes at 375°F (190°C). Always wear oven mitts when handling it, and when you spray the dough with oil, work quickly and close the lid right after to keep the heat in.
Phase 4: Bake
- Carefully remove the hot Dutch oven from the oven and take the lid off.
- Remove the dough from the banneton, turning it right-side up onto a piece of parchment paper.
- Lift the dough by the parchment and set it, parchment and all, into the hot Dutch oven.
- Wearing oven mitts, spray the top of the dough with olive oil or avocado oil to encourage browning.
- Put the lid back on, return the Dutch oven to the oven, and bake for 30 minutes with the lid on.
- Remove the lid and bake for another 10 to 15 minutes, uncovered, until deeply golden.
- Carefully lift the loaf out of the Dutch oven using the parchment and transfer it to a wire cooling rack.
Final Cooling (Non-Negotiable)
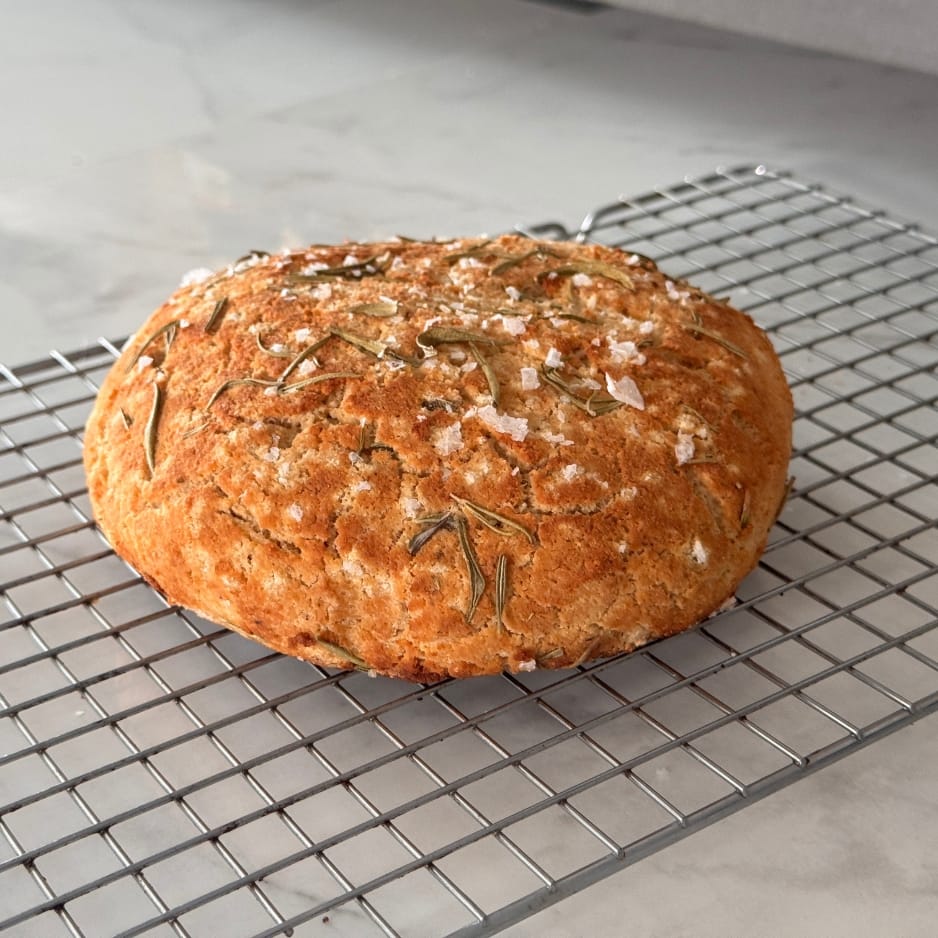
Allow the bread to cool on the rack for a minimum of 2 hours before slicing. Proper cooling allows the gluten to fully set, the psyllium gel to stabilize, moisture to redistribute evenly, and clean sandwich slices. Slicing warm bread traps steam and can create a gummy crumb. Patience produces structure.
Troubleshooting
Common Mistakes
Problem: Twine ridges disappear after baking
Try this: Tie the twine a little tighter next time, don’t skip the rest period in the banneton after tying, and make sure you’re using the full 2 teaspoons of xanthan gum — that’s what gives the dough enough hold to keep the shape.
Why it happens: If the dough is too loose or the twine too loose, oven spring pushes the ridges back out before the crust sets.
Problem: Dough sticks to the banneton
Try this: Flour the tea towel generously before the first rise, and make sure the towel is fully dry.
Why it happens: This dough is enriched with eggs and oil, which makes it a bit tackier than a lean wheat dough and more prone to sticking without enough flour on the towel.
Problem: Pale crust, no crackle
Try this: Confirm the Dutch oven fully preheated for the full 30 minutes, and don’t skip the final uncovered 10 to 15 minutes.
Why it happens: The covered bake traps steam for the rise; the uncovered finish is what actually browns and crisps the crust.
Problem: Crumbly texture that falls apart when sliced
Try this: Confirm you used whole psyllium husks — never powder. Allow the loaf to cool completely (at least 2 hours) before slicing.
Why it happens: Whole psyllium husks hydrate and behave more like gluten, creating a flexible internal network. Powdered psyllium adds density instead of structure. Cutting too early interrupts the setting of that network.
Problem: Not enough sourdough tang
Try this: Use a starter that’s closer to a full 24-hour fermentation. Increase starter slightly and reduce water just enough to maintain structure.
Why it happens: Younger starters produce less acid and fewer fermentation by-products. Time — not force — develops flavour.
Final Reminder
There is no single “correct” version of this bread. Sinless Sourdough™ isn’t about executing a recipe perfectly — it’s about learning how your starter behaves, your dough responds, and your shaping technique improves. Observe. Adjust gently. Bake again. That’s the practice.
Make It Your Own
Variations
Actual Pumpkin Spice
Want real pumpkin flavour to match the shape? Add 2 teaspoons pumpkin pie spice and 2 tablespoons well-drained pumpkin purée to the wet ingredients. This adds a small amount of natural sugar, so recalculate your net carbs if you go this route.
Suggested pairing: sugar-free maple butter
Herb & Garlic
Add 2 teaspoons dried Italian herbs; add 1–2 cloves minced garlic and 1 teaspoon garlic powder. Creates a savoury profile perfect for pasta dishes or bruschetta.
Suggested pairing: olive oil dipping sauce with balsamic vinegar (use sparingly — it’s higher in sugar than it looks)
Everything Bagel
Add 2 tablespoons everything bagel seasoning to dry ingredients; brush top with egg wash before baking for extra seeds to stick. Mimics popular bagel flavour in convenient bread form.
Suggested pairing: cream cheese and smoked salmon
Seed Power Bread
Add 2 tablespoons sunflower seeds; add 1 tablespoon pumpkin seeds and 1 tablespoon sesame seeds. Provides extra crunch, healthy fats, and minerals.
Suggested pairing: avocado toast with sea salt
Mediterranean Olive
Add ⅓ cup chopped kalamata olives (well-drained); add 1 teaspoon dried oregano and ½ teaspoon dried basil. Brings bold, briny flavours to every slice.
Suggested pairing: Greek salad or tzatziki dip
By the Numbers
Nutrition Facts
These nutritional values are provided as guidance only. Please calculate your own values based on the specific brands and products you use, as nutritional information can vary significantly between brands and even between countries selling the same brands.
Entire Loaf
Calories: 1,684 kcal • Total Carbs: 150g • Fiber: 123g • Net Carbs: 27g • Protein: 213g • Fat: 52.8g • Sugar: Negligible (consumed during fermentation) • Cholesterol: ~370mg • Sodium: ~2,400mg
Per Slice (12 slices per loaf)
Calories: ~140 kcal • Total Carbs: ~12.5g • Fiber: ~10.25g • Net Carbs: ~2.25g • Protein: ~17.75g • Fat: ~4.4g • Sugar: <1g • Cholesterol: ~31mg • Sodium: ~200mg
Values may vary depending on specific brands of vital wheat gluten, oat fibre, and psyllium husk powder used. The 2 teaspoons of xanthan gum add a negligible amount of calories and carbs and are not broken out separately here. The optional Pumpkin Spice variation is not included in these figures.
Why These Macros Are a Good Fit for Flexible Keto
- Protein-to-net-carb ratio: nearly 8:1, making this incredibly satiating
- Fibre content: each slice provides over 10g of fibre
- Traditional comparison: regular wheat bread has 15–20g net carbs per slice — this has 89% fewer
- Meal flexibility: low carb count allows room for other foods throughout the day
Serving Ideas
How Should You Serve This Loaf?
As a Centrepiece
- Serve whole at the table for Thanksgiving, or any fall gathering, letting guests slice their own from the pumpkin-shaped loaf
- Pair with a warm cheese or spinach dip for a rustic bread-and-dip centrepiece
Classic Breakfast Pairings
- Toast with sugar-free almond butter and berries for morning fuel
- Eggs benedict with hollandaise sauce on toasted slices
Hearty Lunch Options
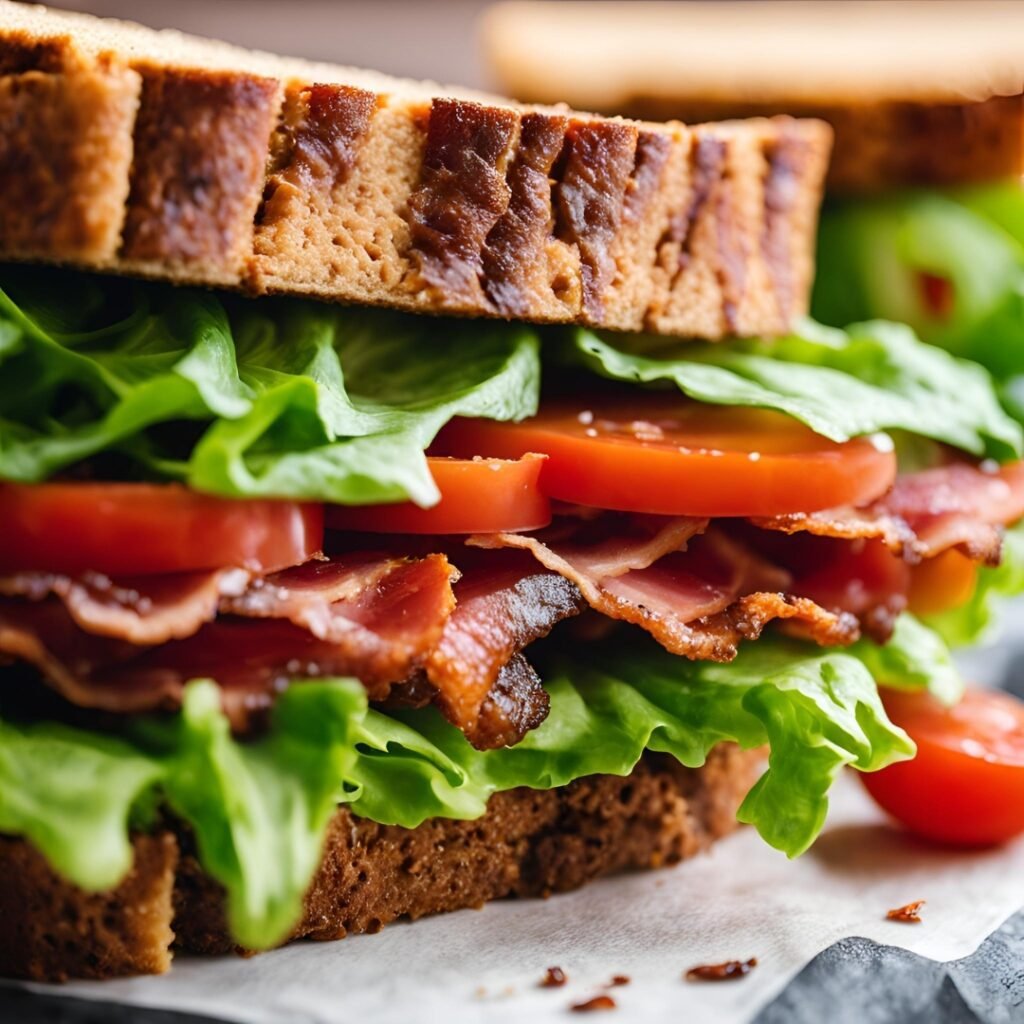
- Turkey, bacon, avocado club sandwich with lettuce and tomato
- Grilled cheese with sharp cheddar and sugar-free tomato soup
Dinner Applications
- Garlic bread brushed with butter and herbs alongside pasta
- Bread bowl for flexible keto chili or creamy soup
- Stuffing base for holiday turkey or chicken
Keeping It Fresh
How Do You Store This Bread?
Room Temperature Storage
Up to 3 days in an airtight container away from direct sunlight. Slice only what you need to maintain freshness of the remaining loaf.
Refrigerator Storage
Up to 1 week wrapped tightly in plastic wrap or stored in a sealed container. Toast slices directly from the refrigerator for best texture and warmth.
Freezer Storage
Up to 3 months when sliced and individually wrapped in parchment paper. Toast frozen slices directly in the toaster or toaster oven without thawing.
Pro Tip: Pre-slice the entire loaf before freezing and store in a freezer-safe bag with parchment paper between slices — grab one slice at a time for zero waste and maximum convenience.
Setting Expectations
Why Is Your First Bake a Practice Bake?
Every oven, Dutch oven, and kitchen environment operates slightly differently. Your first loaf helps you understand how your specific equipment performs with this recipe.
Oven and Dutch Oven Variations
Dutch ovens vary by material and size — a thick cast iron pot holds and radiates heat differently than an enamelled steel one, and a smaller pot will brown faster than a wide one. Home ovens also run hot or cool compared to their dial settings, which affects both rise time and crust colour.
Ingredient Brand Differences
Anthony’s vital wheat gluten behaves differently than Bob’s Red Mill. One brand of psyllium husk powder may absorb more moisture than another. Your specific keto starter’s fermentation speed depends on the flour you feed it and ambient temperature.
Personal Palate Adjustments
Non-tasters (roughly 25% of the population) may prefer extra salt or herbs for flavour intensity
Medium tasters (roughly 50% of the population) will find the recipe as written typically works perfectly
Super tasters (roughly 25% of the population) may find sourdough tang overwhelming and prefer shorter starter fermentation
The first loaf establishes your baseline for both flavour and shaping — subsequent bakes become increasingly perfect as you fine-tune the twine tension, proof time, and bake to your specific equipment. Don’t be discouraged if your first pumpkin isn’t picture-perfect. Use it as valuable data to make your second loaf even better.
KETO SOURDOUGH DISCARD PUMPKIN LOAF
A keto sourdough discard loaf shaped to look like a pumpkin — not flavoured like one. Butcher’s twine presses rustic ridges into the proofed dough before it’s baked in a Dutch oven for a crackling, bakery-style crust. Ideal for Thanksgiving, or any bake during the autumn season.
- Prep Time: 1 Hour 55 Minutes
- Cook Time: 40 to 45 Minutes
- Total Time: 4 Hours 40 Minuutes
- Yield: 12
- Category: Side Dish, Snack
- Method: Baking
- Cuisine: American
- Diet: Diabetic, Keto, Low-Carb
Ingredients
- 1 cup + 2 tablespoons (266 mL) spring water, warmed (lukewarm, 73–77°F / 23–25°C)
- 1 cup (240g) living Biome Boss™ discard (or Global Heritage Collection starter fed with blanched almond flour and coconut flour)
- 2 large eggs, room temperature, beaten
- 2 tablespoons (30 mL) olive oil or avocado oil
- ½ cup (50g) oat fibre
- ¼ cup (28g) whole psyllium husks
- 2 teaspoons xanthan gum
- 1½ cups (180g) vital wheat gluten
- 1 teaspoon (6g) Celtic or Himalayan salt
- 1 teaspoon (4g) sugar
- 1 tablespoon (15g) double-acting baking powder
- 1 tablespoon (9g) SAF instant yeast
Instructions
- 1 cup + 2 tablespoons (266 mL) spring water, warmed (lukewarm, 73–77°F / 23–25°C)
- 1 cup (240g) living Biome Boss™ discard (or Global Heritage Collection starter fed with blanched almond flour and coconut flour)
- 2 large eggs, room temperature, beaten
- 2 tablespoons (30 mL) olive oil or avocado oil
- ½ cup (50g) oat fibre
- ¼ cup (28g) whole psyllium husks
- 2 teaspoons xanthan gum
- 1½ cups (180g) vital wheat gluten
- 1 teaspoon (6g) Celtic or Himalayan salt
- 1 teaspoon (4g) sugar
- 1 tablespoon (15g) double-acting baking powder
- 1 tablespoon (9g) SAF instant yeast
Notes
Yield: 1 loaf (12 slices) | Category: Bread | Method: Stand Mixer / Bread Machine (dough only) + Dutch Oven | Cuisine: Keto / Low Carb
Equipment:
- Stand mixer with dough hook, or bread machine (dough cycle only)
- Round banneton or round-bottom bowl, lined with a tea towel
- 3–4 pieces butcher’s twine (100% cotton)
- 5–6 quart Dutch oven with lid
- Parchment paper
- Oil spray bottle (olive or avocado oil)
- Oven mitts
- Digital kitchen scale, liquid measuring cup
- Serrated bread knife, wire cooling rack
Notes:
- Use whole psyllium husks, never powder.
- Dutch oven will be extremely hot after preheating; always use oven mitts.
- Every starter, oven, and Dutch oven behaves a little differently — your first loaf is a practice bake.
- Optional: add 2 tsp pumpkin pie spice + 2 tbsp well-drained pumpkin purée to the wet ingredients for actual pumpkin flavour (adds a small amount of natural sugar — recalculate net carbs if used).

Responses